1. Elevating Walls with Artistic Wainscoting
Timeless elegance and functional sophistication come together in kitchen wainscoting, a design detail that once served a practical purpose but now fuels creativity. This architectural feature now safeguards walls from kitchen activities while becoming a canvas for artistic expression. Whether homeowners lean towards the classic charm of shaker-style panels or the rustic allure of beadboard, wainscoting offers a world of possibilities to enhance their culinary space. From traditional lower wall applications to innovative backsplash installations, this adaptable feature caters to every kitchen style and budget. Advances in materials and installation techniques have made wainscoting more accessible than ever, enabling homeowners to achieve bespoke millwork looks without the need for extensive renovation costs. The key to success lies in selecting a style, height, and finish that harmoniously complements the kitchen’s existing elements, creating a visually cohesive space.

As an Amazon Associate I earn from qualifying purchases.
2. Shaker Style Wainscoting: A Clean and Functional Design
Shaker wainscoting embodies the principles of clean, functional design that effortlessly complements both traditional and modern kitchen aesthetics. This flat-panel system features simple rectangular frames with recessed centers, creating sophisticated geometric patterns along lower walls. The minimalist approach works particularly well in contemporary kitchens, where sleek appliances and streamlined cabinetry can sometimes compete with ornate details. Standard heights range from 36 to 42 inches, aligning perfectly with countertop levels for seamless integration. Choosing wider panels can maintain proper proportions in spacious kitchens, while narrower configurations better suit compact spaces. The flat surfaces of Shaker panels are easy to clean and maintain, making them a practical choice for busy cooking areas. Crafted from materials like MDF, wood, or composite materials, these panels can be painted to match or contrast with existing cabinetry for a cohesive design flow throughout the kitchen space.
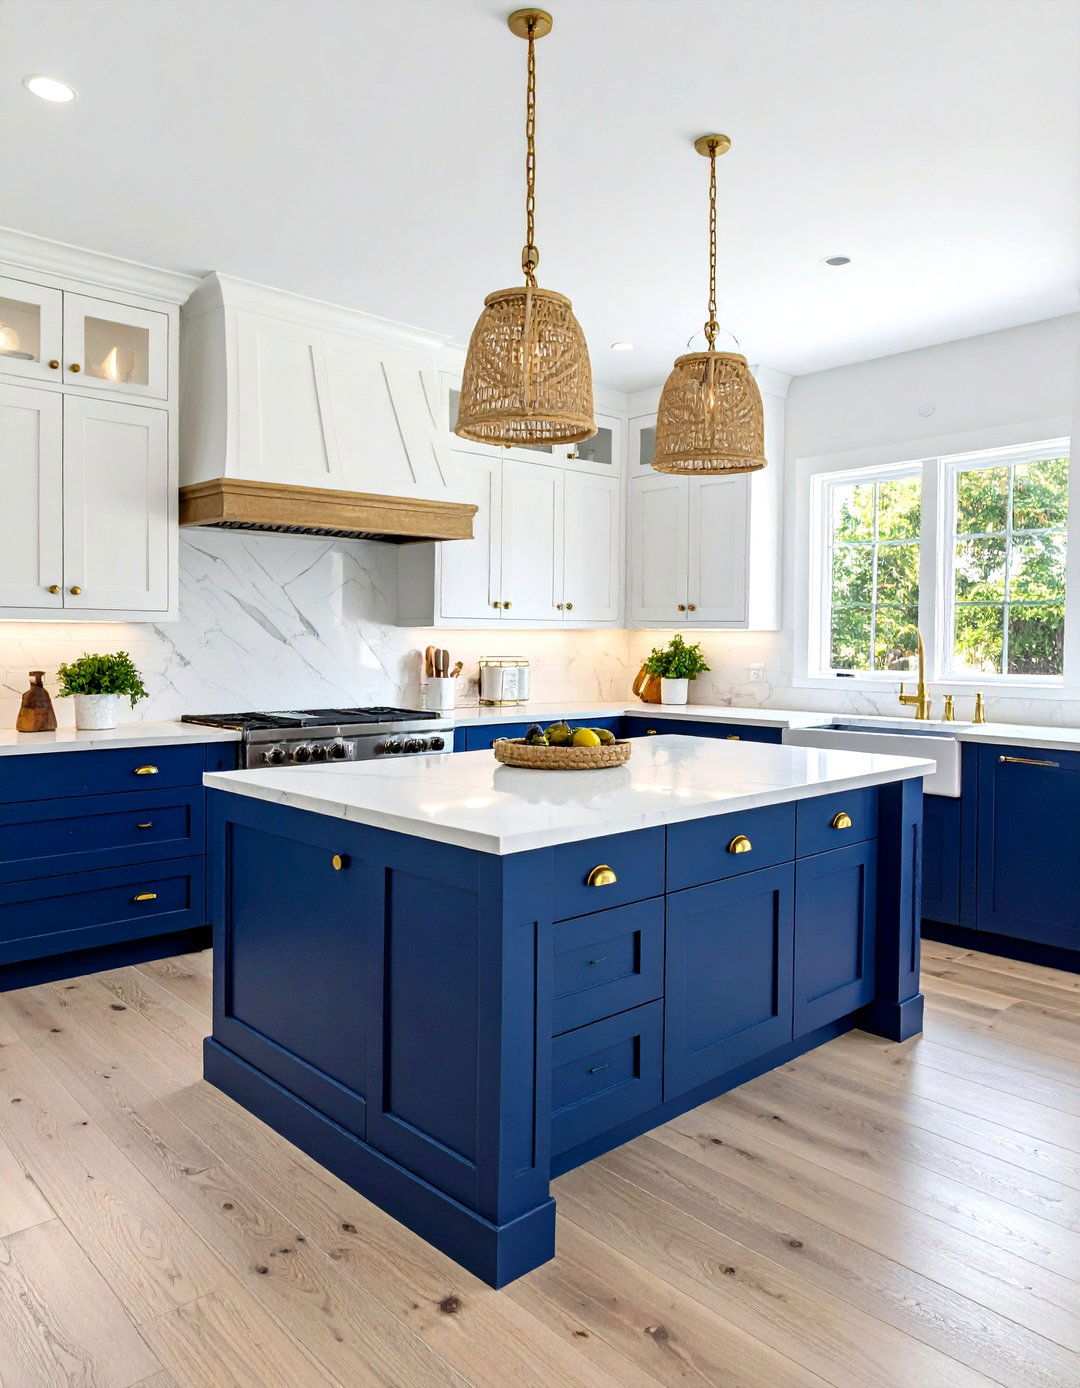
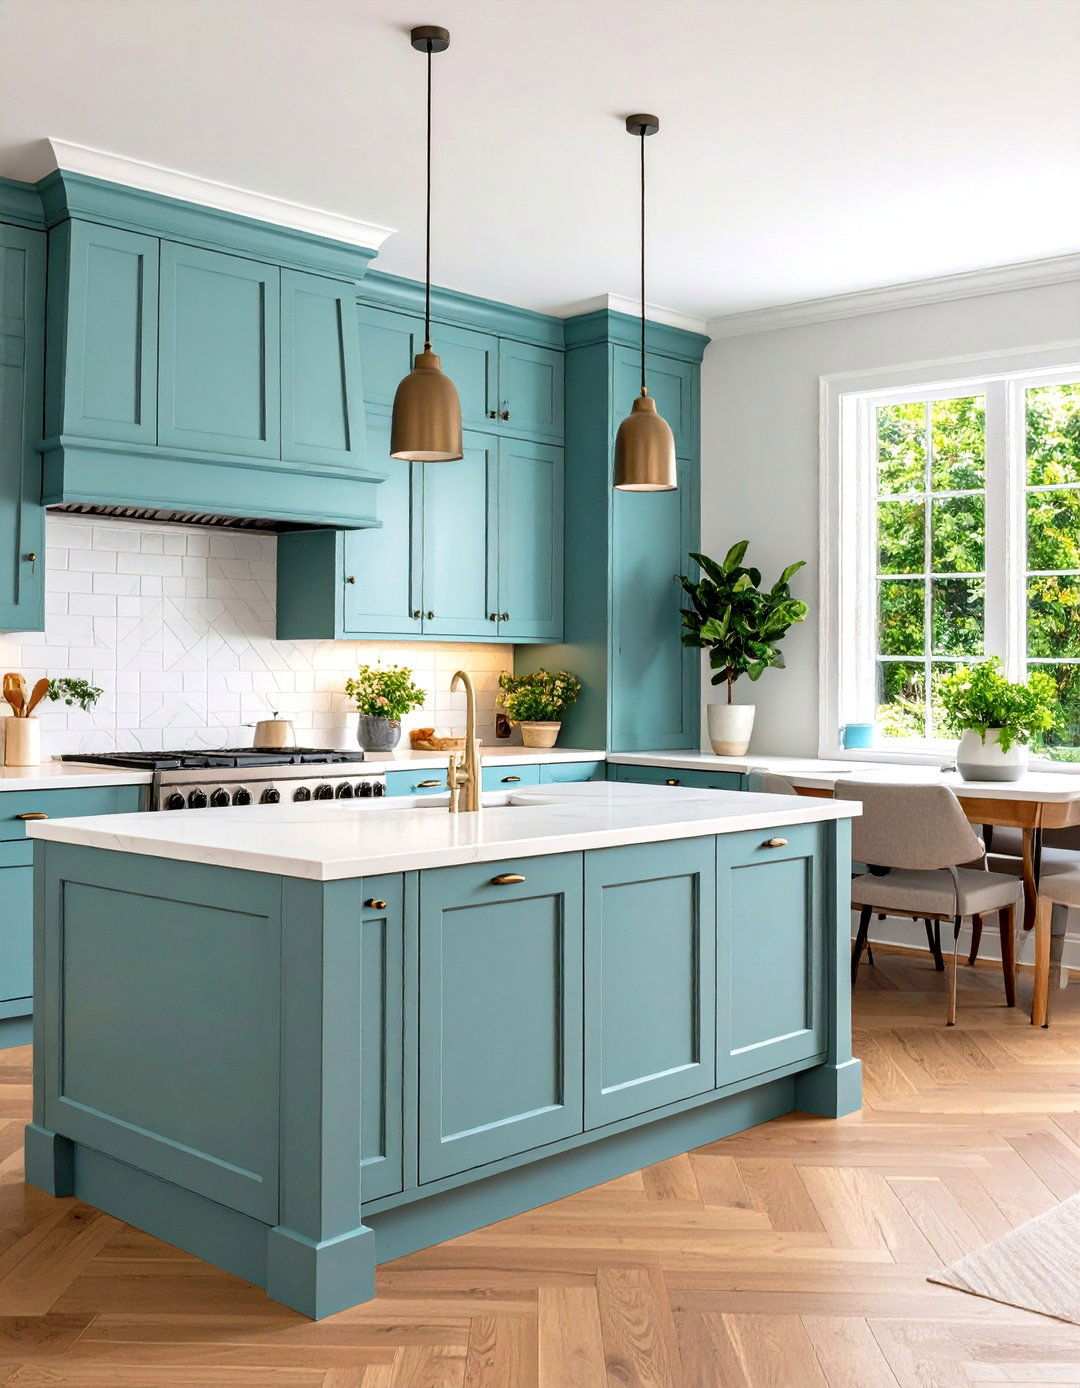
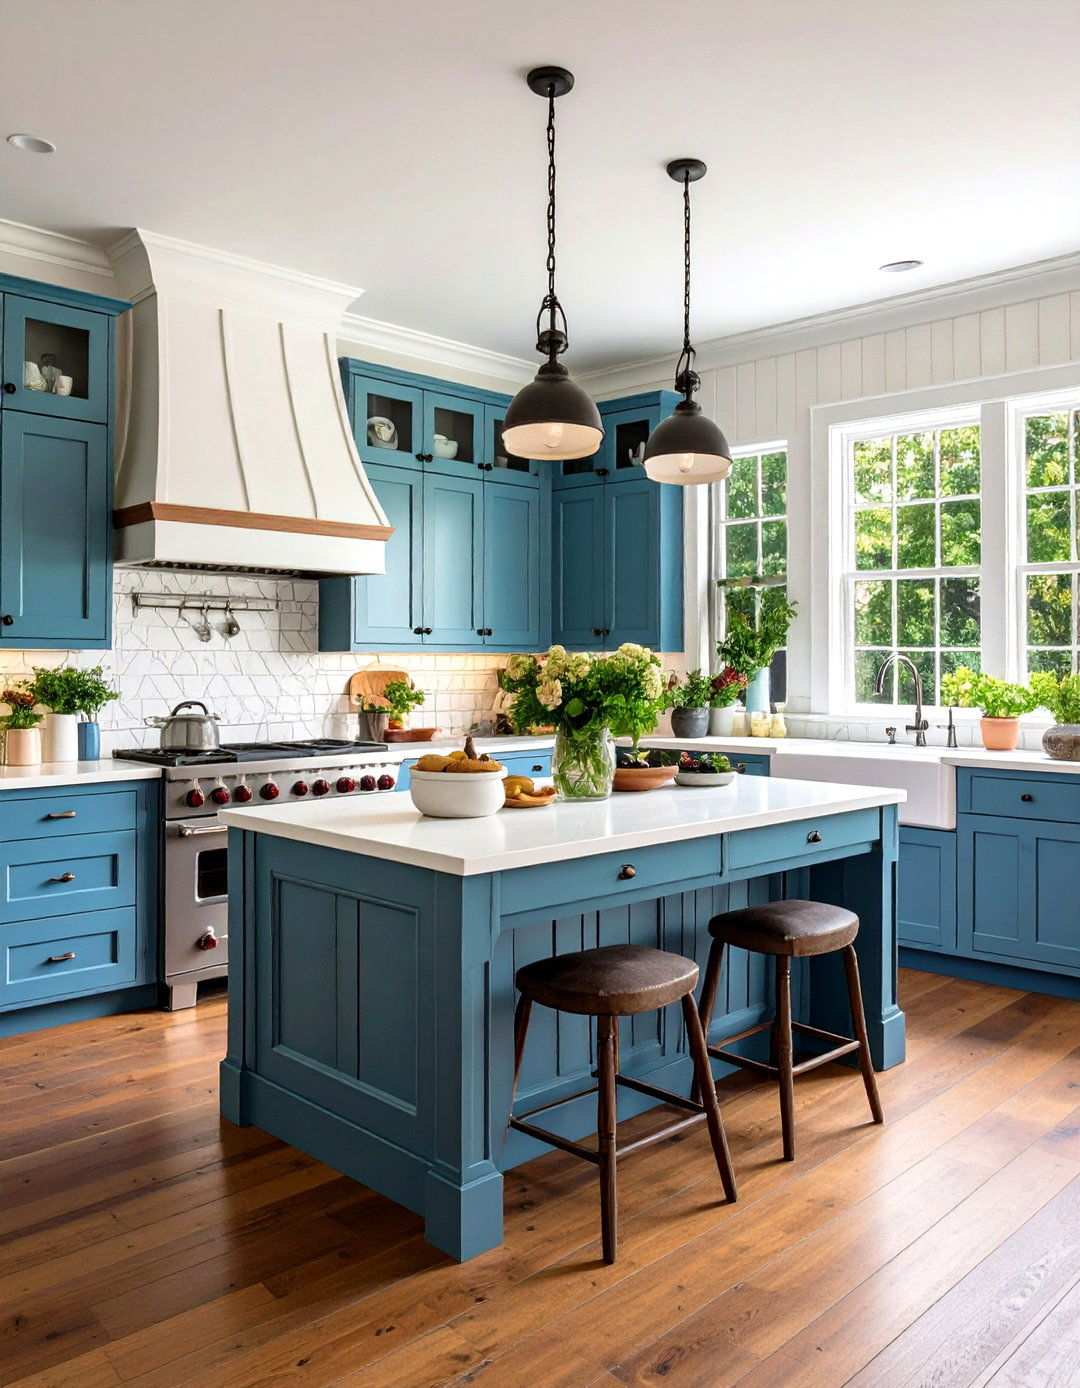
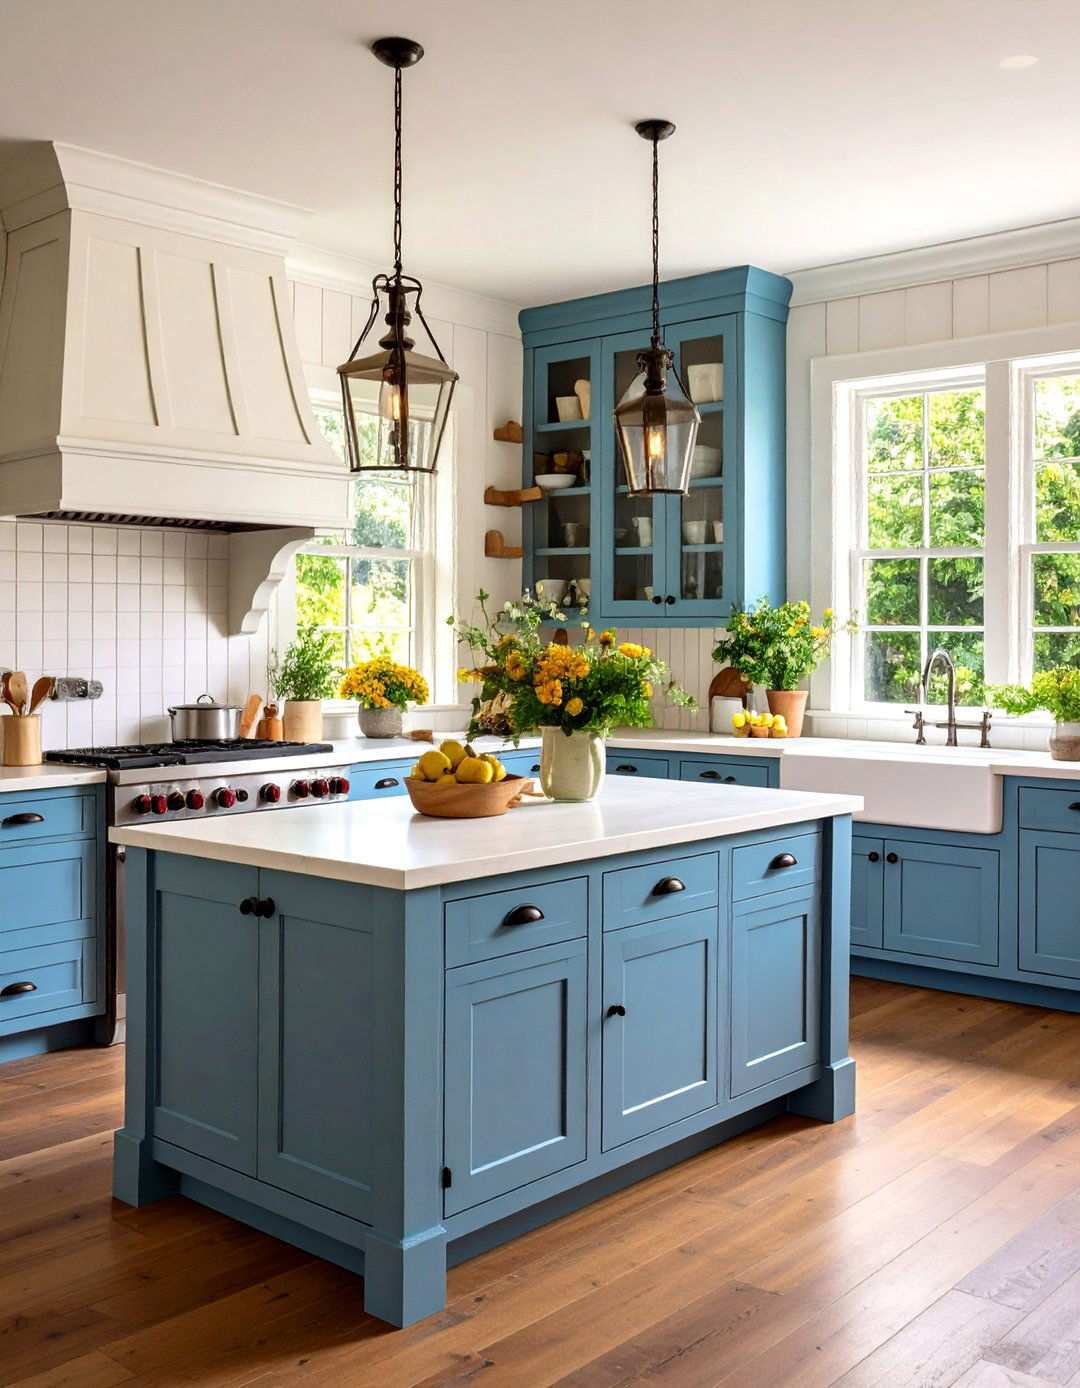
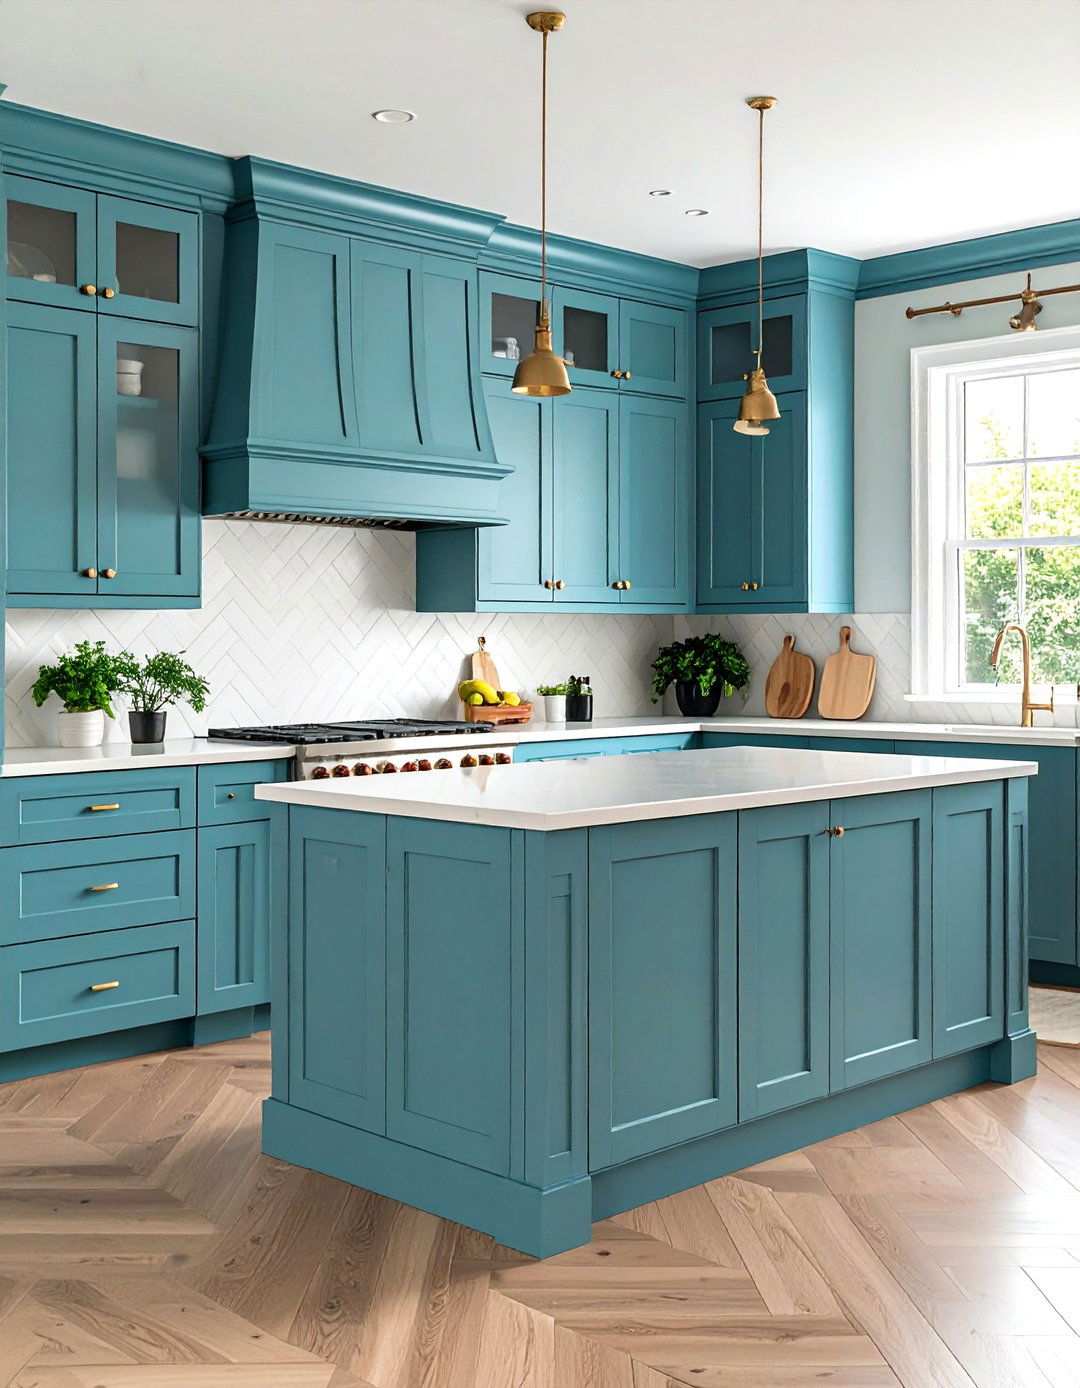
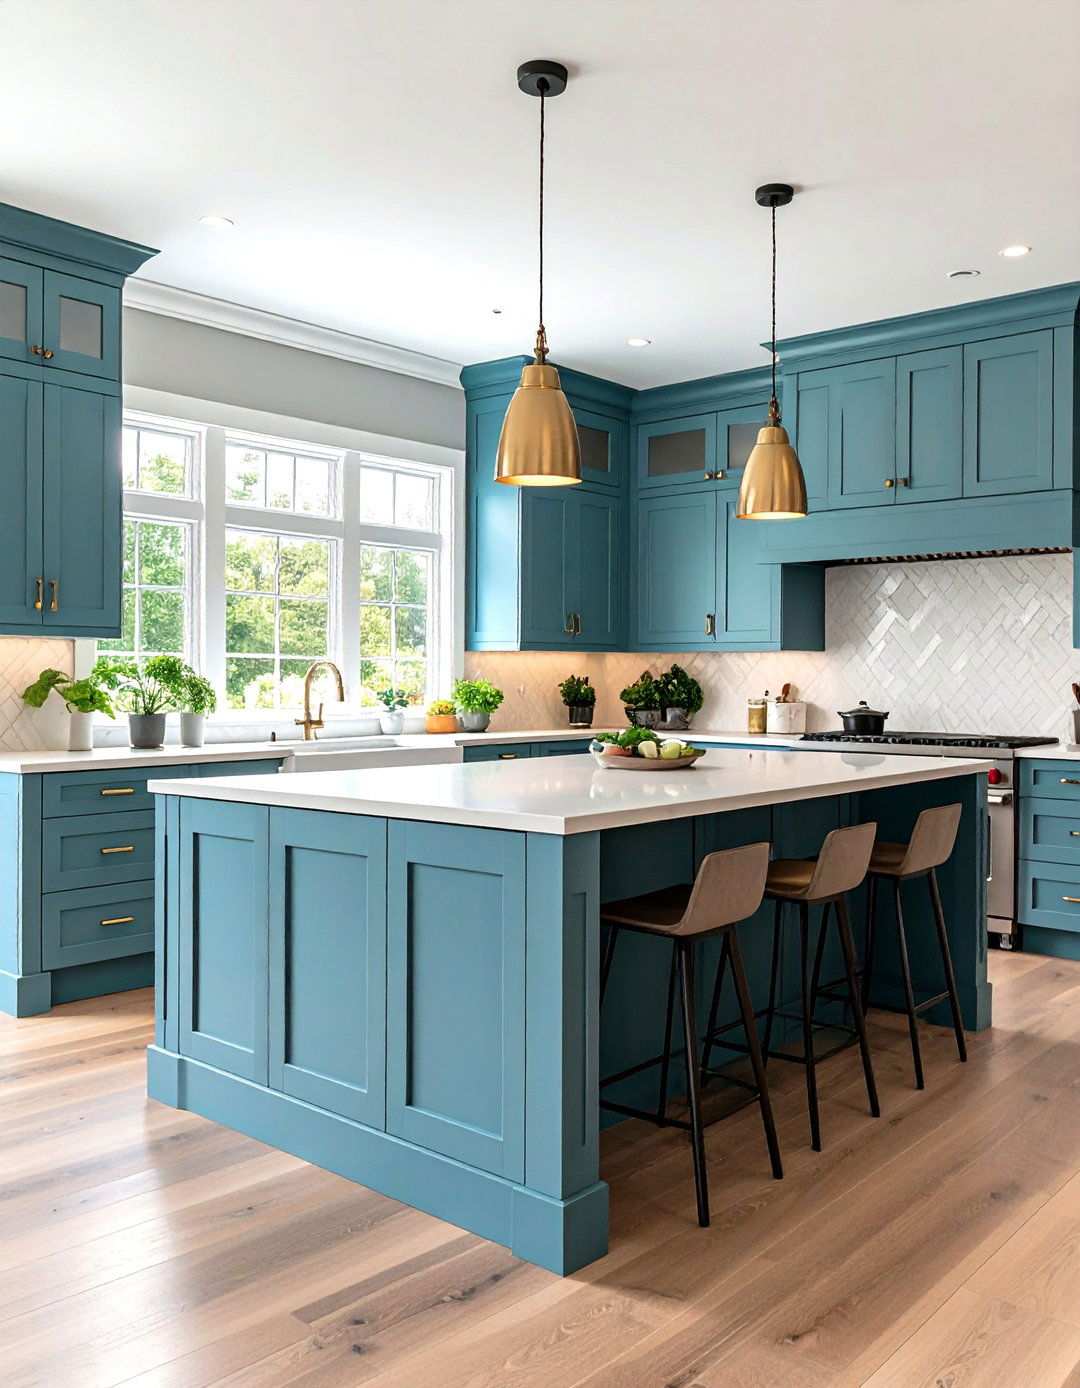
3. Elevating Your Kitchen Island with Custom Wainscoting
Give your kitchen island a sophisticated makeover by incorporating custom wainscoting panels, which can transform this central workspace into an architectural focal point. By installing wainscoting on the vertical surfaces below countertop overhangs, you can create a cohesive look that ties in seamlessly with your surrounding cabinetry. For a timeless design, opt for board and batten styles, which feature clean lines that complement both traditional and transitional kitchen schemes. To achieve a more polished appearance, consider extending the wainscoting panels around the entire island perimeter, or focus on the most visible sides if budget is a concern. When it comes to height, align the wainscoting with standard counter levels at 36 inches, ensuring that it blends harmoniously with bar seating and pendant lighting. Additionally, color choices can either blend in with existing cabinetry for a seamless look or provide contrast through darker or lighter tones, adding an extra layer of visual interest. By incorporating wainscoting, you can not only enhance the aesthetic appeal of your kitchen island but also protect the surface from scuffs and dings caused by daily use.
4. Creating an Intimate Dining Nook with Raised Panel Wainscoting
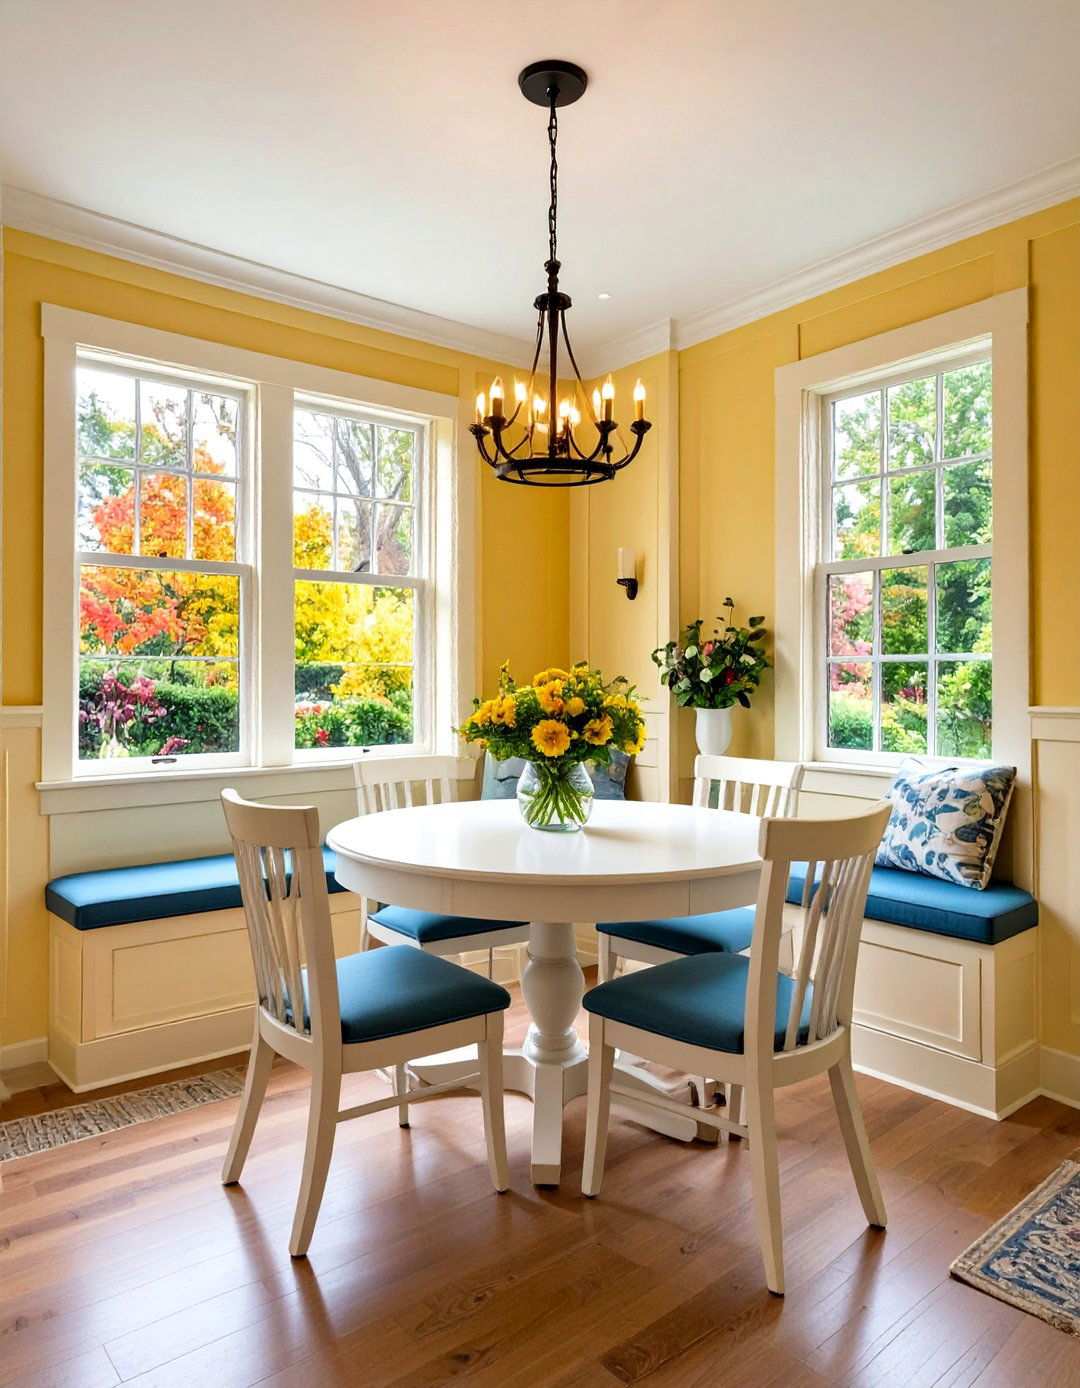
Raised panel wainscoting can add a touch of sophistication to your kitchen dining area, creating an intimate breakfast nook that feels worlds apart from the bustling cooking zone. These three-dimensional panels feature beveled edges and recessed centers that catch the light beautifully, adding depth and architectural detail to your space. For a classic look, extend the wainscoting approximately one-third up the wall height, topped with decorative chair rails that provide a natural break for color changes or wallpaper applications above. Raised panel wainscoting works particularly well in colonial, traditional, or transitional kitchen designs, where classical proportions can enhance the overall aesthetic appeal. To create a cohesive look, consider painting the panels in soft neutrals like cream or pale gray while using deeper tones above the chair rail for dramatic contrast. When combined with built-in bench seating, raised panel wainscoting creates a cozy dining arrangement perfect for family meals. By opting for professional installation, you can ensure that the panels are aligned perfectly and the corners are smooth, showcasing the craftsmanship quality that these features deserve.
5. Elevating Kitchen Pantry Storage with Full-Height Wainscoting
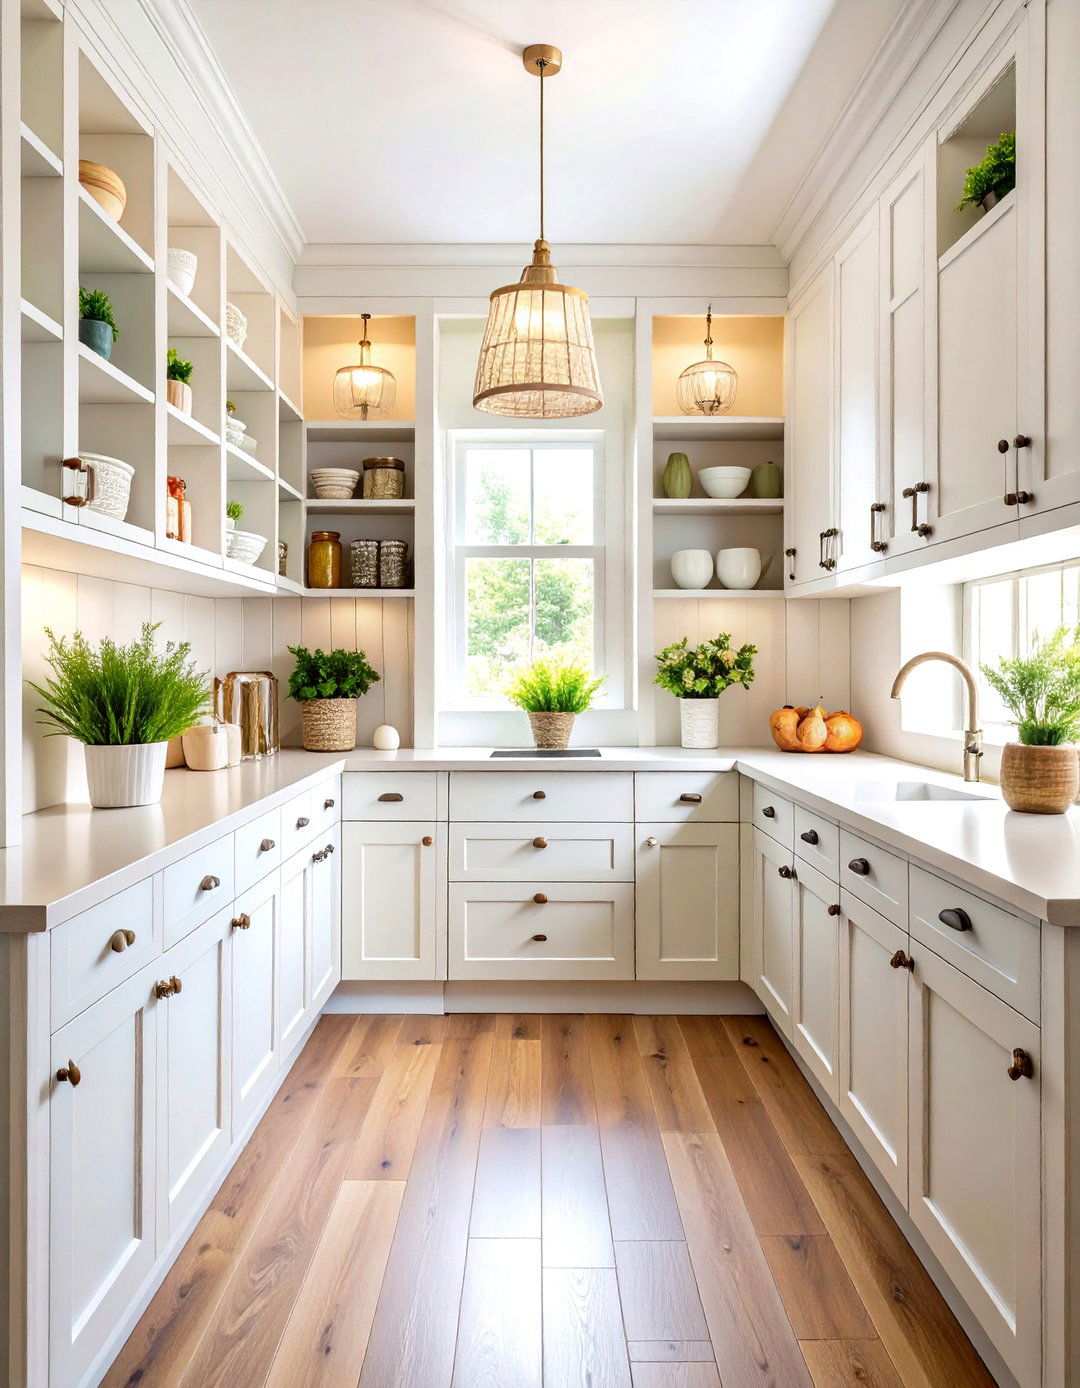
A full-height wainscoting installation in a kitchen pantry is a game-changer for creating bespoke storage spaces that exude high-end sophistication. In walk-in pantries, where daily use and shelving take a toll on walls, wall protection becomes a top priority. For this reason, flat panel or beadboard styles are ideal, providing smooth surfaces that resist dust accumulation and won’t interfere with shelf installations. To enhance visibility in typically windowless spaces, opt for light and airy paint colors, such as white, cream, or pale gray tones that reflect artificial lighting while maintaining a clean and hygienic appearance. By incorporating continuous paneling, the visual cohesion of the space is enhanced, making small pantries appear larger and more organized. To create a seamless design flow, coordinate panel styles with kitchen cabinetry or choose simpler profiles that won’t compete with more elaborate kitchen millwork. Professional installation ensures proper electrical outlet integration and provides smooth transitions around doorways and corners, maintaining the polished appearance these spaces deserve.
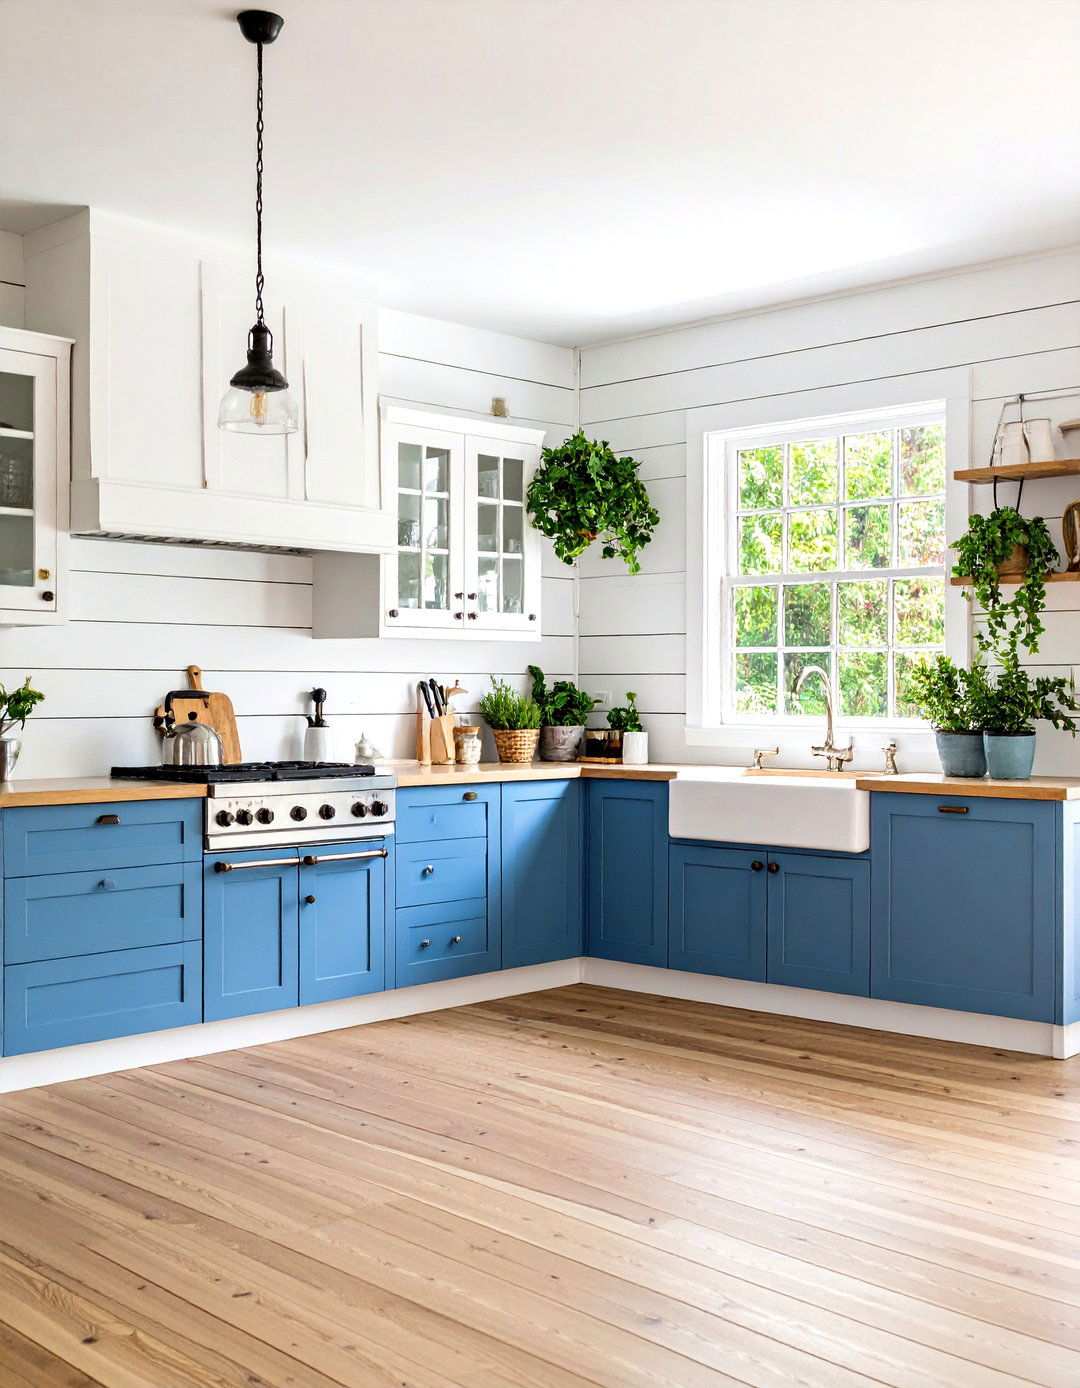
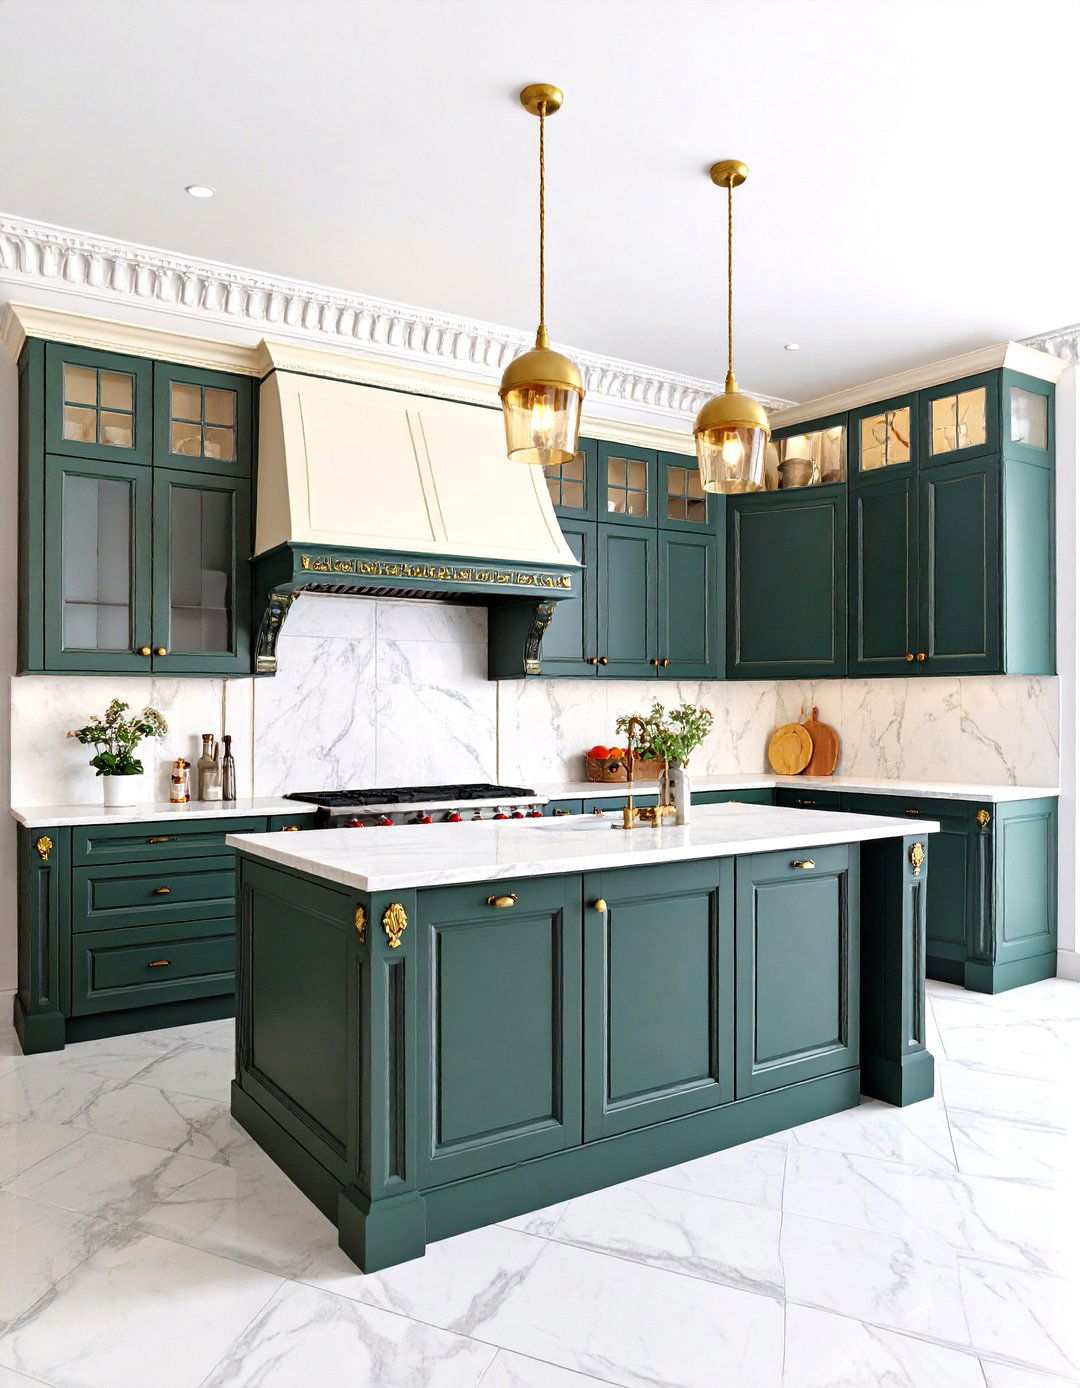
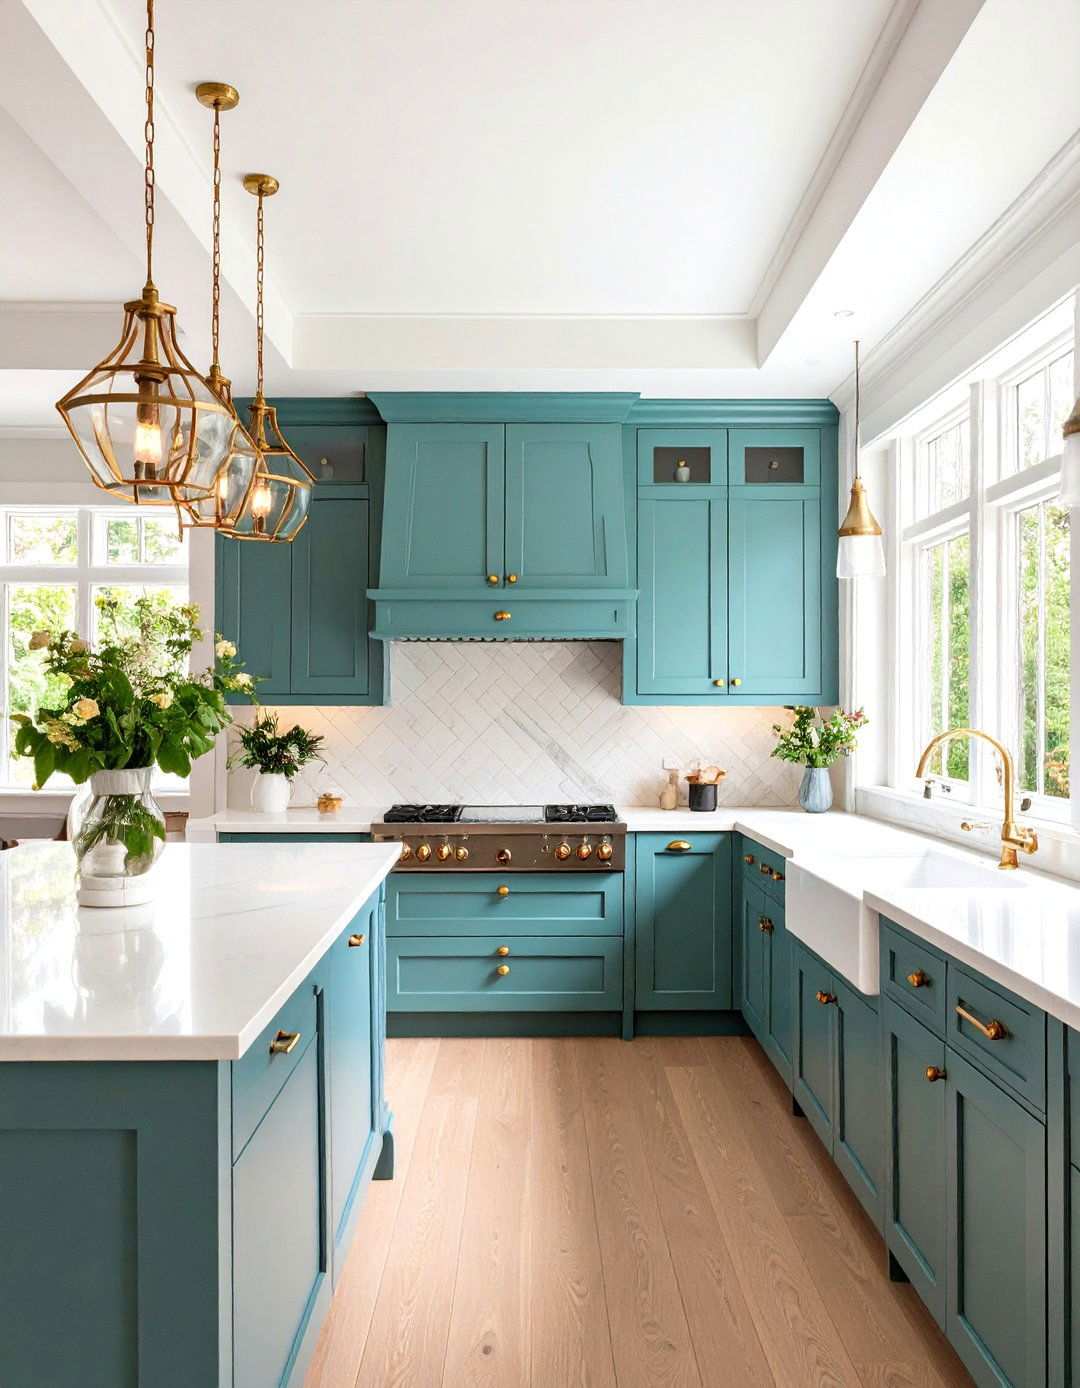
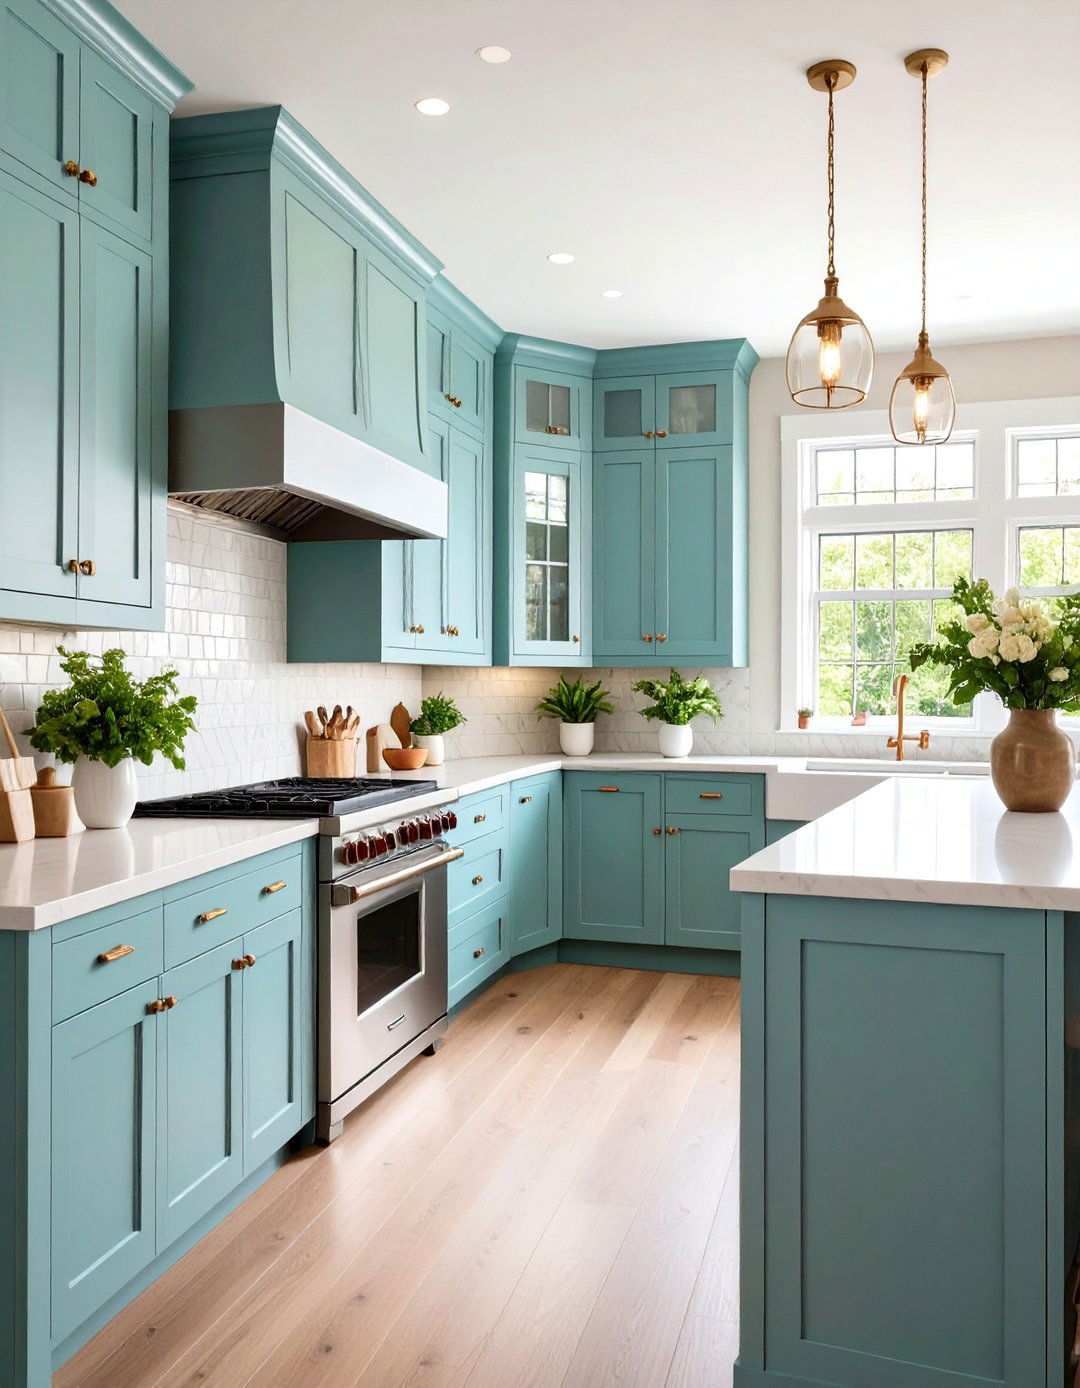
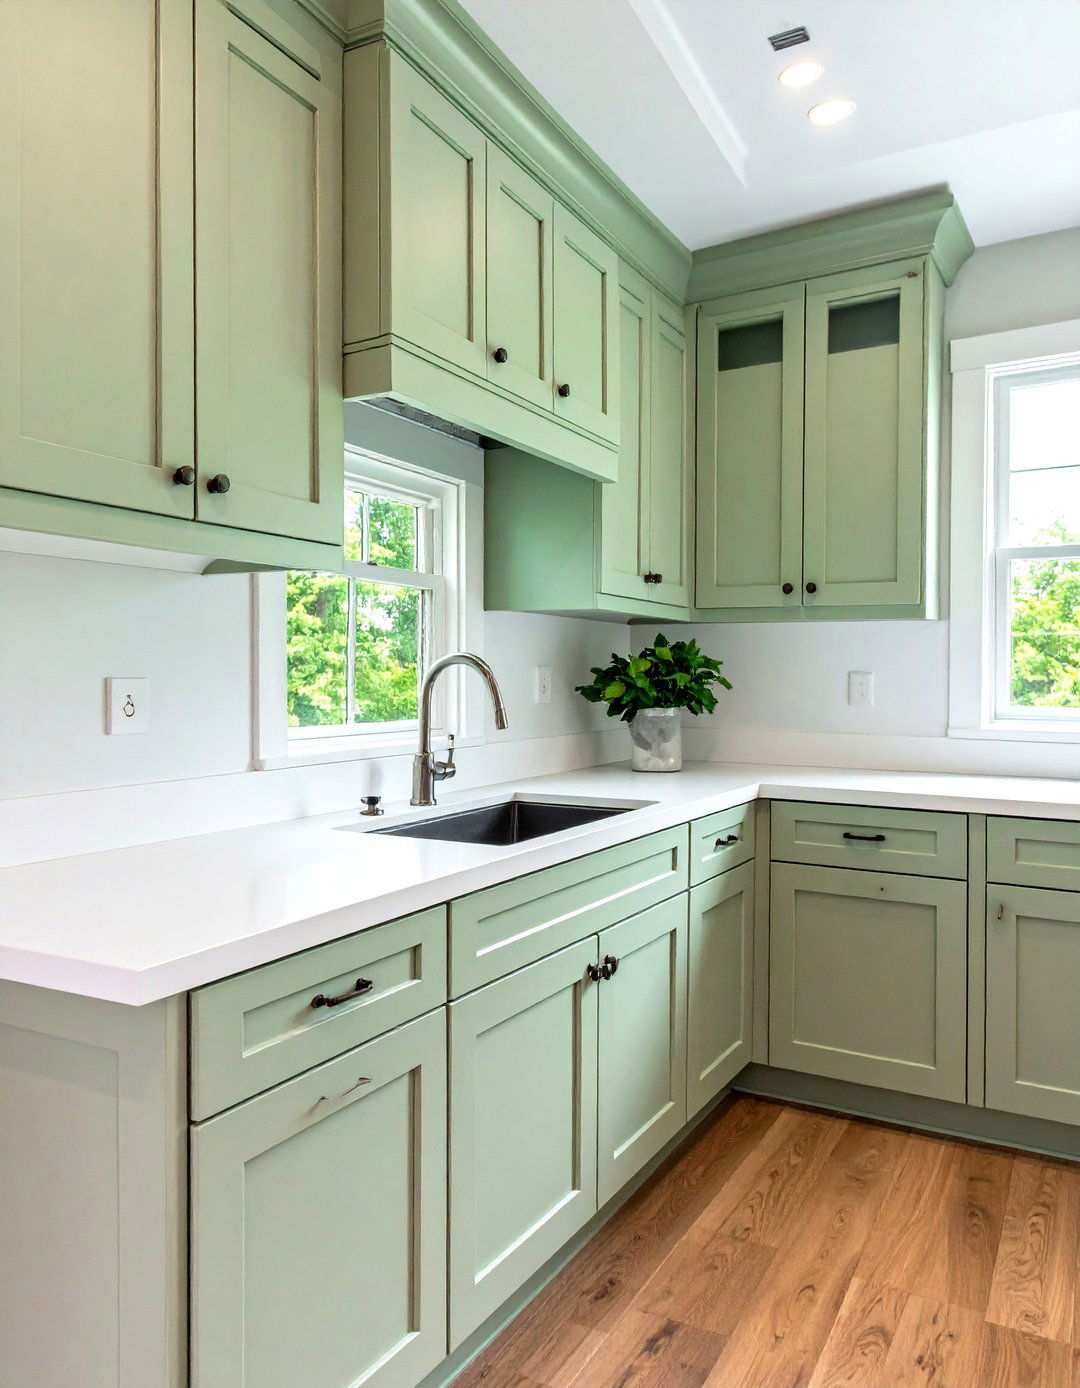
6. Harnessing Visual Interest with Two-Tone Kitchen Wainscoting
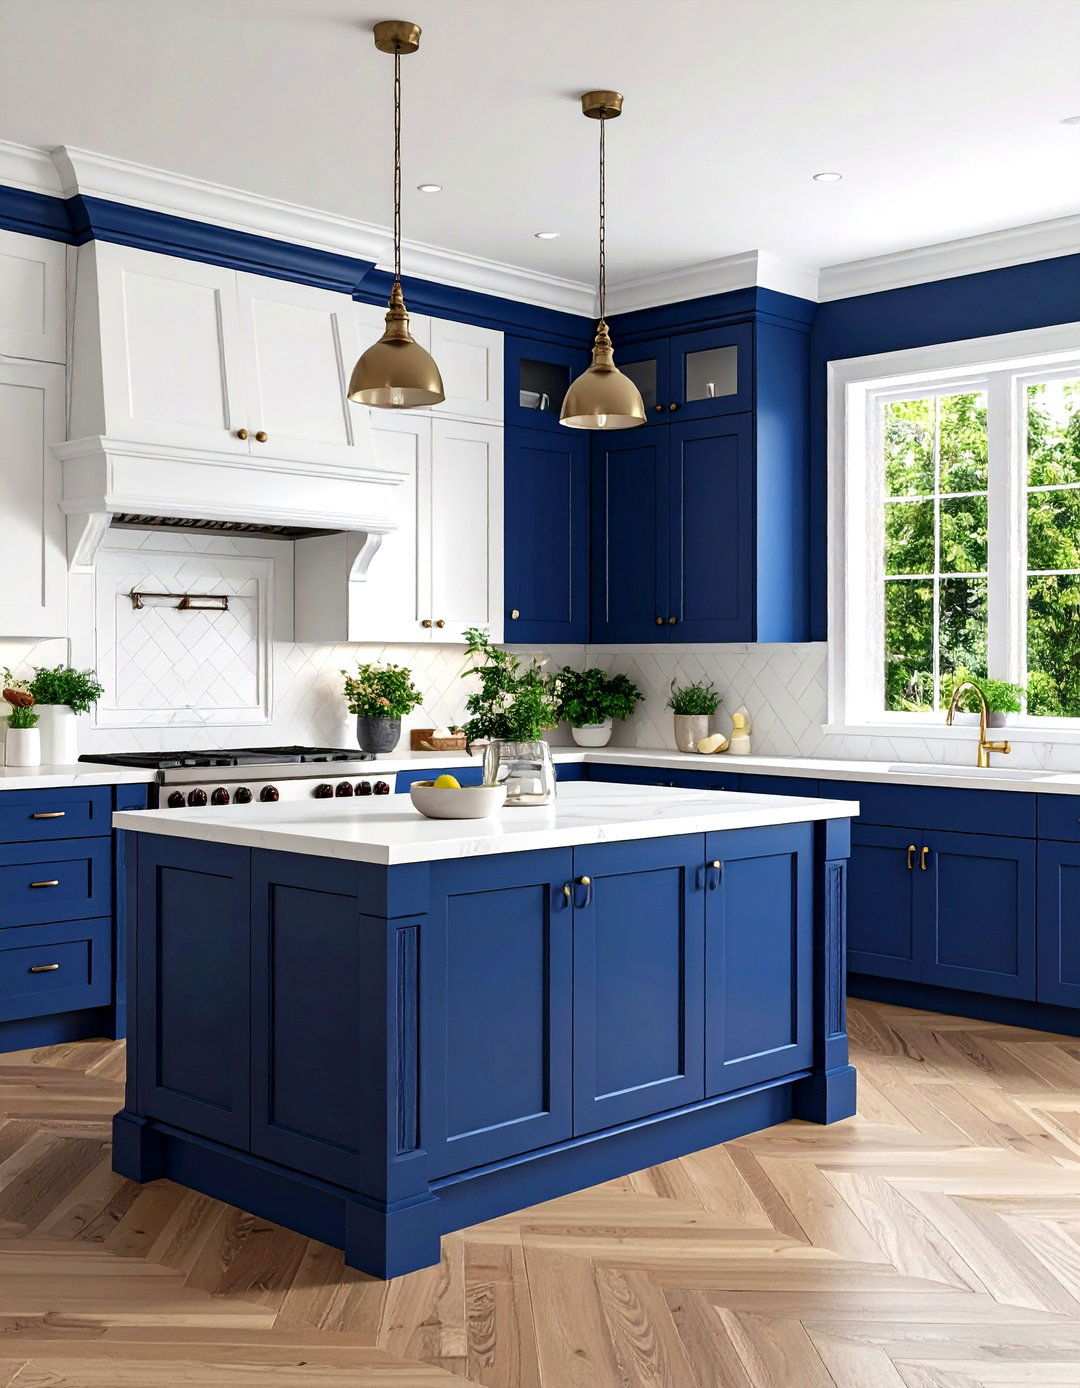
A two-tone wainscoting design injects dynamic visual interest into a kitchen through strategic color combinations that define space while adding personality to kitchen walls. This approach typically features darker tones on lower wainscoting sections, with lighter colors above the chair rail, creating natural horizon lines that enhance room proportions. Popular combinations include navy blue panels with white or cream upper walls, sage green wainscoting with soft gray above, or charcoal panels topped with warm beige. The contrast helps define distinct zones within open-concept kitchens while maintaining cohesive design flow. When selecting color combinations, consider the room’s natural lighting – darker lower sections can ground spaces with abundant windows, while lighter tones work better in kitchens with limited natural light. Coordinate colors with existing cabinetry and countertop materials for harmonious results. The visual weight of darker lower sections creates stability, while lighter upper portions maintain airiness and prevent overwhelming smaller kitchen spaces.
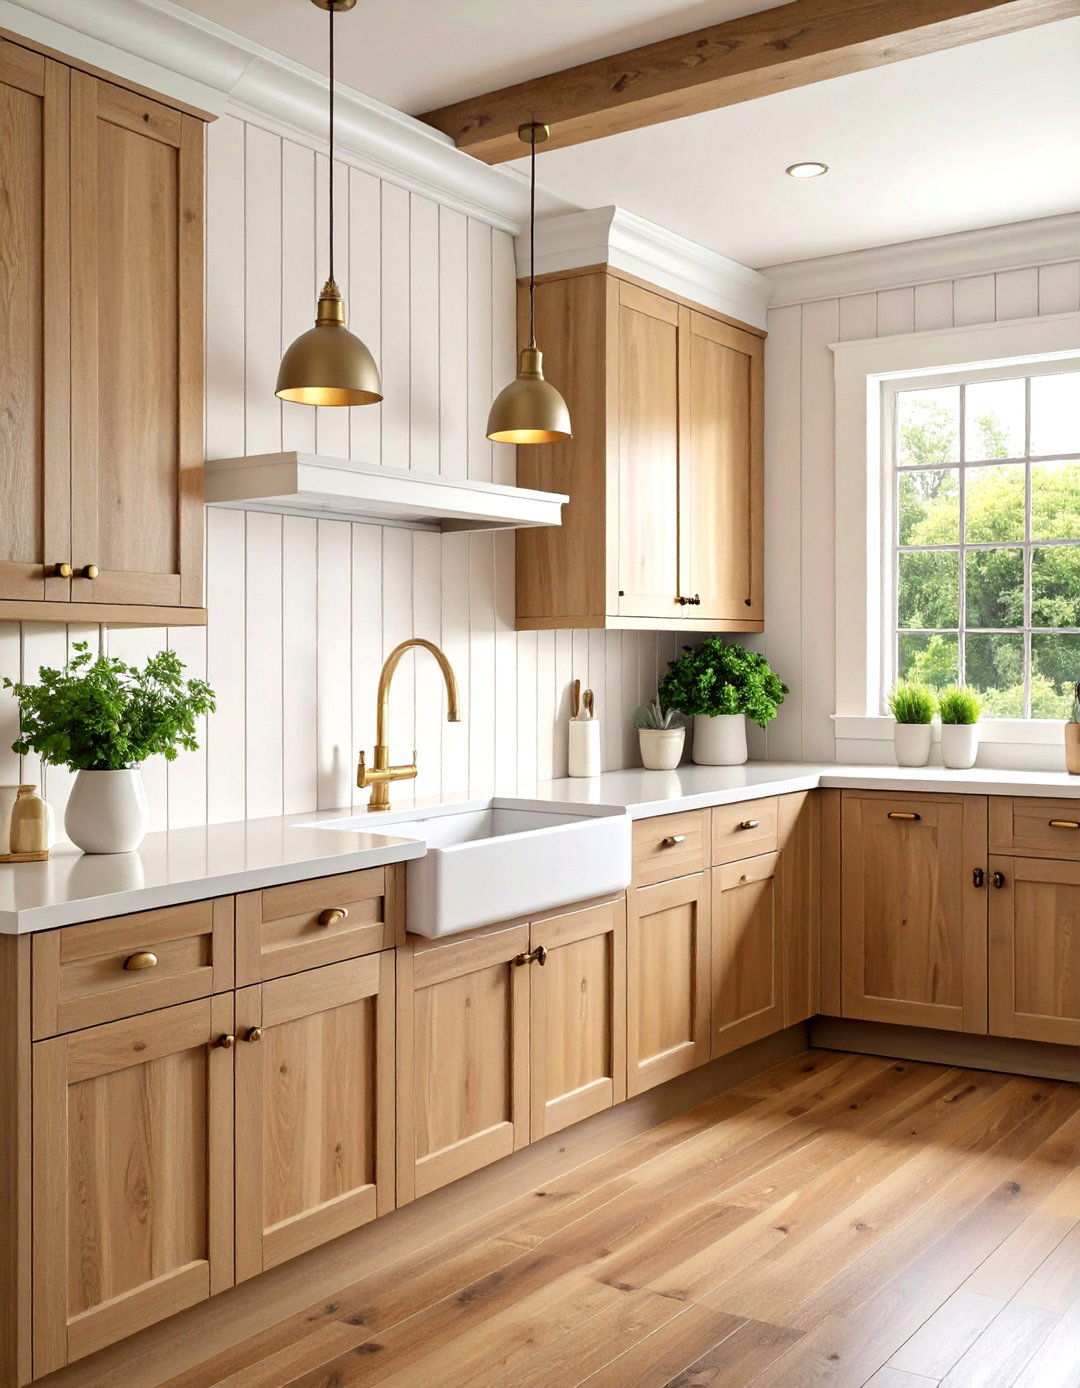
7. Reclaimed Wood Wainscoting for a Touch of Authenticity
Adding reclaimed wood wainscoting to a kitchen design imbues the space with a deep sense of history and environmental responsibility. This unique approach celebrates the beauty of natural materials and sustainable practices, creating a distinctive look that’s impossible to replicate with new materials. The weathered planks display one-of-a-kind patina and grain patterns that tell a story of their own, making each installation a truly singular work of art. When it comes to rustic applications, horizontal installations are particularly effective in highlighting the natural width variations and aged characteristics that make each plank special. To achieve this look, consider using authentic sources like barn wood, shipping pallets, or architectural salvage, and be sure to properly clean and treat the wood before installation. As the irregular nature of reclaimed materials can be unpredictable, flexible installation approaches are essential to accommodate varying thicknesses and lengths. To preserve the wood’s authentic appearance, opt for natural finishes, while protective sealers ensure durability in kitchen environments. This timeless approach is well-suited to farmhouse, industrial, or transitional kitchens, where the contrast between aged wood and modern appliances creates a compelling visual tension that grounds contemporary conveniences in historical context.
8. Flat Panel Wainscoting for a Modern Edge
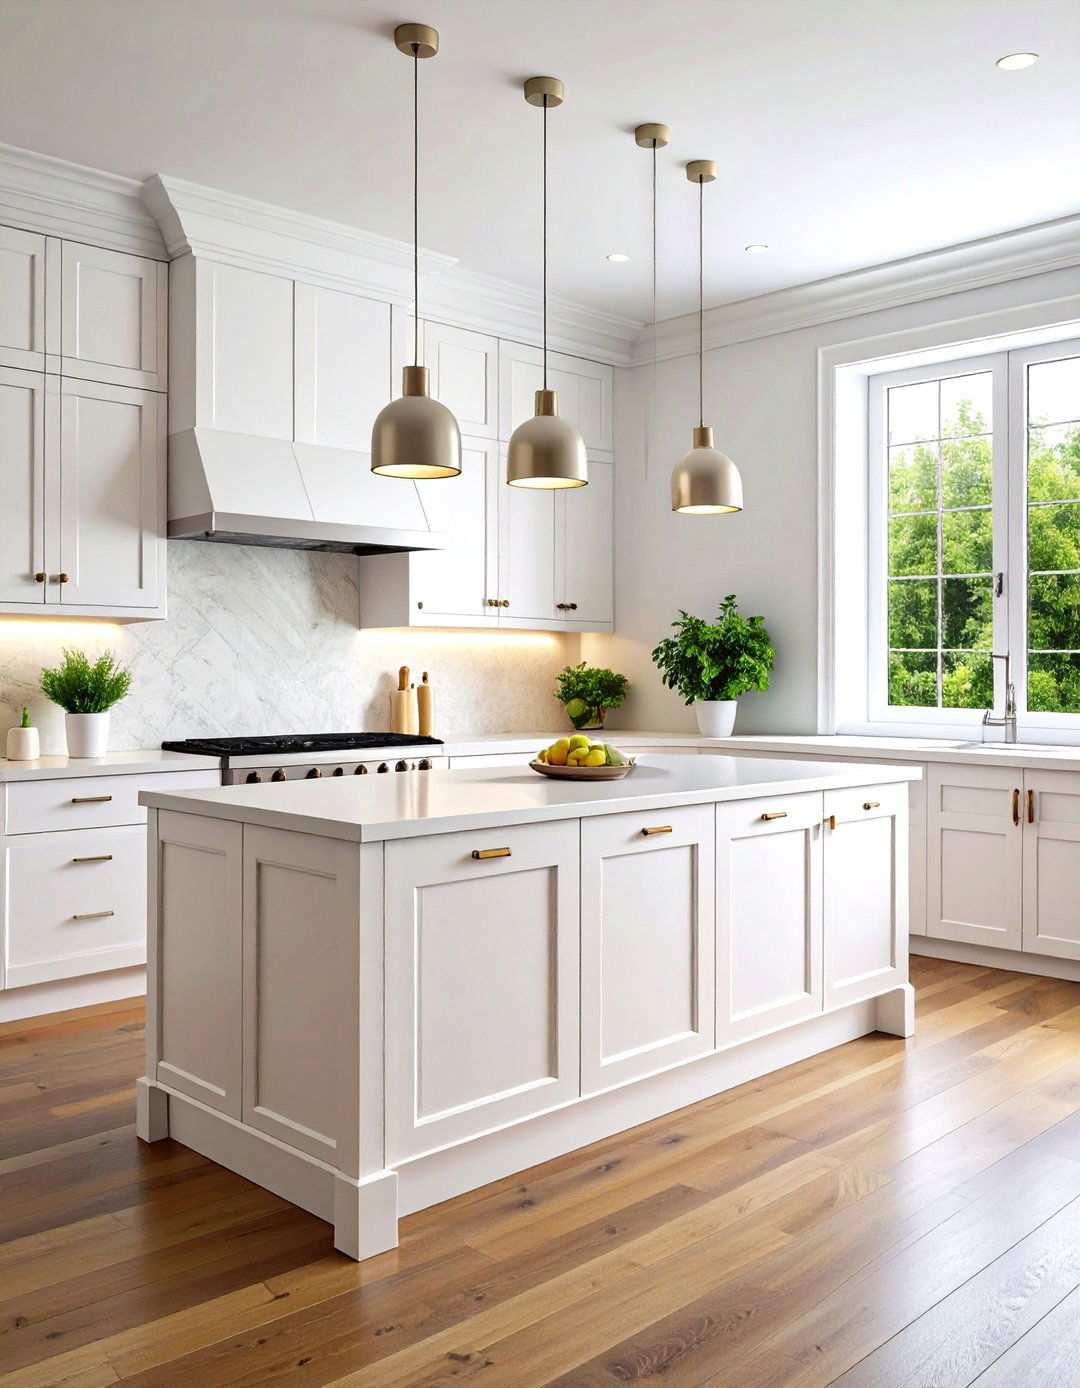
In contemporary kitchen designs, flat panel wainscoting offers a clean and minimalist aesthetic that complements sleek appliances and streamlined cabinetry without competing for attention. These smooth-faced panels create subtle texture through reveals and shadow lines, rather than relying on ornate profiles or raised details. Larger panel sizes are ideal for modern applications, as they maintain the simplified aesthetic that defines contemporary design principles. To create a seamless look, consider floor-to-ceiling installations that eliminate chair rails for uninterrupted vertical lines, or opt for traditional one-third height applications with minimal top treatments. When it comes to paint colors, neutral shades like whites, grays, or subtle earth tones are best, as they enhance rather than dominate the space. The smooth surfaces of flat panel wainscoting are exceptionally easy to clean and maintain, making them a practical choice for busy cooking areas. Professional installation ensures perfectly straight reveals and seamless corners, showcasing the precision expected in modern design. By incorporating flat panel wainscoting, homeowners can create an understated yet sophisticated look that allows architectural elements, lighting, and furnishings to take center stage.
9. Elevating Kitchen Design with Timeless Board and Batten Treatment
Board and batten wainscoting embodies classic American style, effortlessly blending into farmhouse, colonial, and traditional kitchen designs. The rhythmic pattern created by wide boards and narrow vertical strips (battens) adds a sense of sophistication to lower walls, drawing the eye upward and creating the illusion of higher ceilings. Traditional installations typically span 32 to 36 inches from floor level, topped by simple chair rails that serve as natural transition points. To complement this style, paint colors should harmonize with existing trim and cabinetry, often featuring soft white or cream tones that accentuate the clean, crisp appearance required. However, kitchen environments can be challenging, as gaps between boards can collect dust and grease; thus, proper sealing and regular cleaning become essential maintenance tasks. To achieve optimal proportions, consider spacing battens every 12 to 16 inches, adjusting slightly to accommodate existing features like outlets or corner transitions while maintaining visual rhythm throughout the installation.
10. Seamlessly Integrating Wainscoting with Kitchen Windows
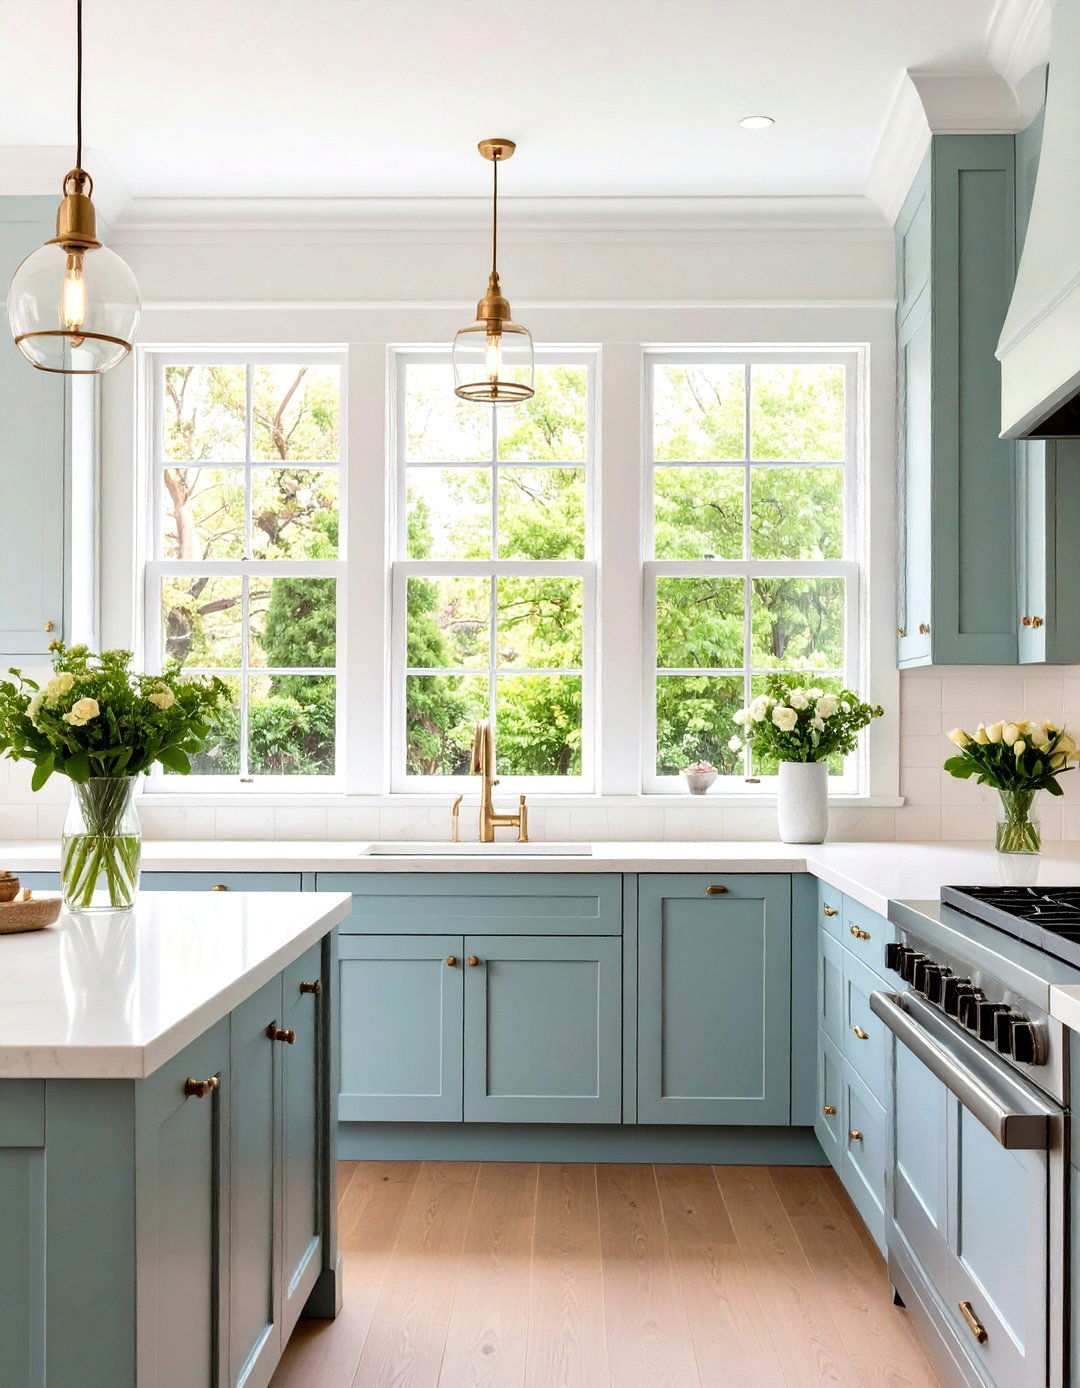
Integrating wainscoting around kitchen windows demands thoughtful planning to maintain visual continuity while addressing varying sill heights and trim profiles. The key to success lies in establishing consistent panel heights that work in harmony with window proportions and existing architectural elements. A practical approach involves running wainscoting at standard chair rail height (32-36 inches) regardless of sill location, creating horizontal bands that unify the space. Where windows extend below wainscoting height, custom panel configurations can be created to frame the openings without resulting in awkward L-shaped boxes. To achieve seamless integration, coordinate panel styles with existing window casings, using similar profiles and paint colors throughout. Under-window panels can incorporate shorter rectangles that maintain proper proportions while accommodating architectural constraints. A professional installation ensures smooth transitions around window trim and consistent reveal spacing despite irregular wall features, resulting in cohesive wall treatments that enhance natural light and provide architectural interest in kitchen spaces.
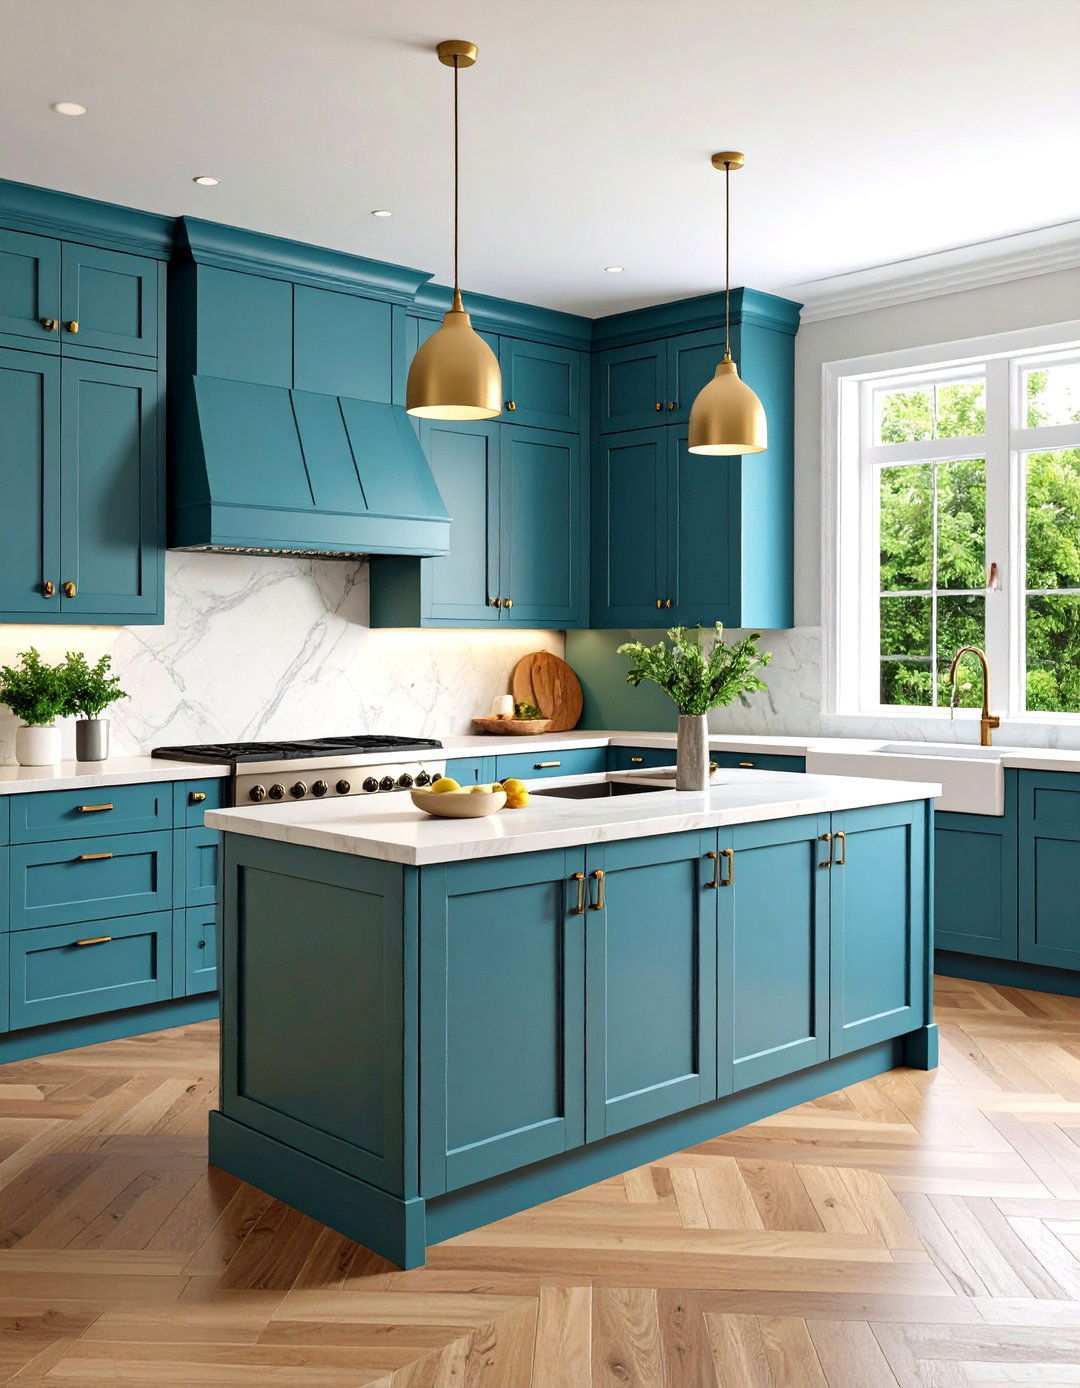
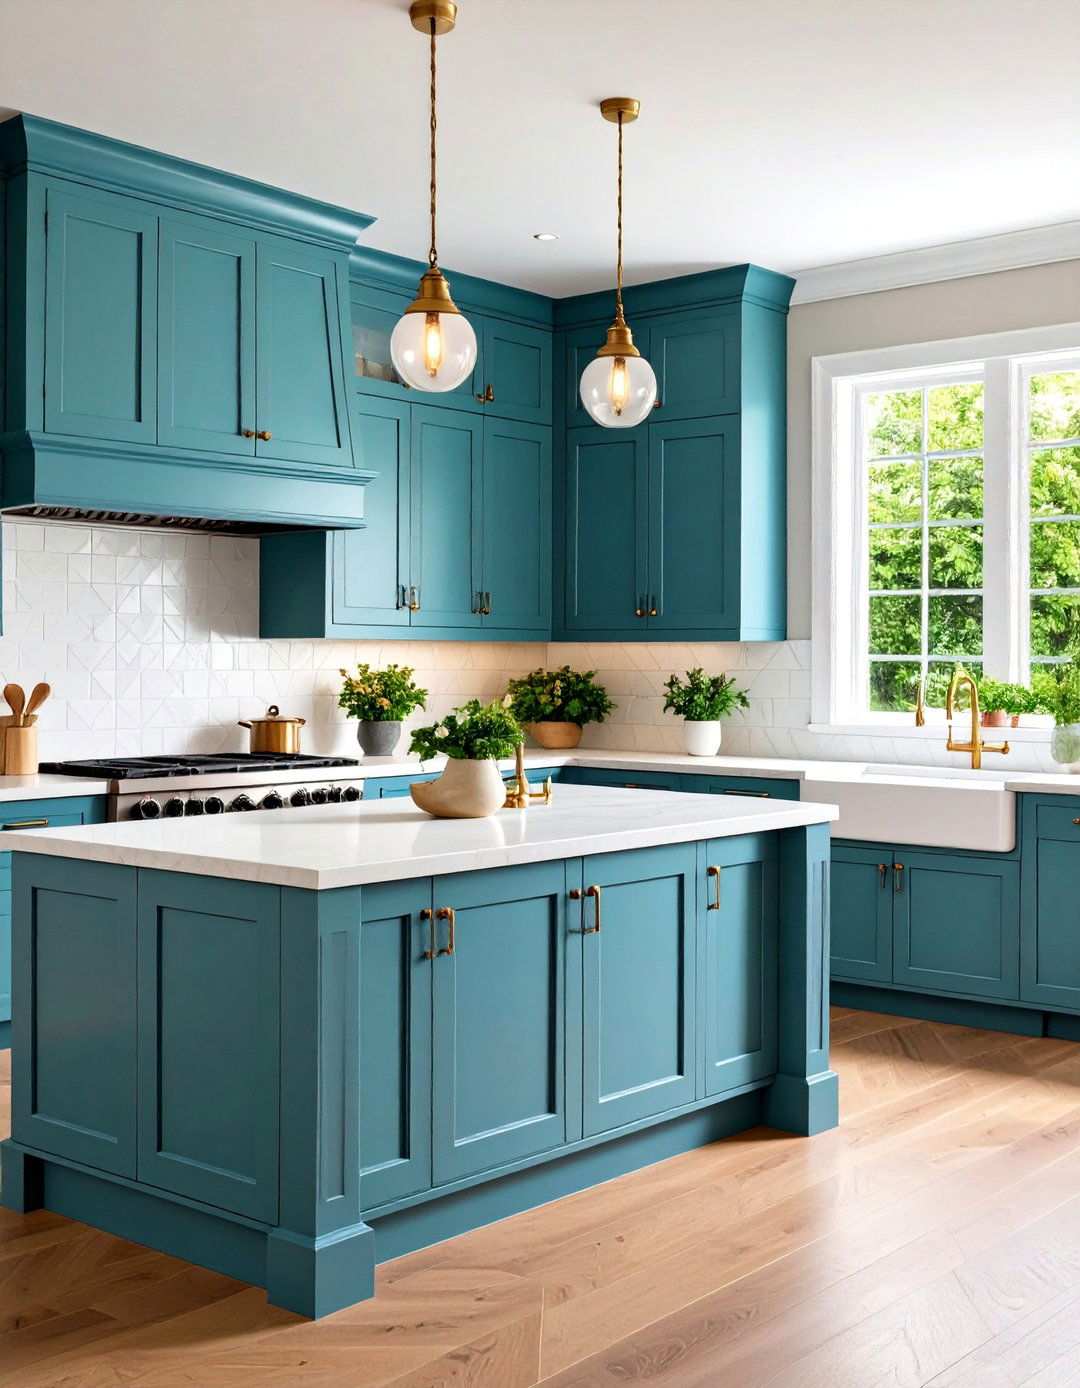
11. Elevating Kitchen Wainscoting with Painted Color Schemes
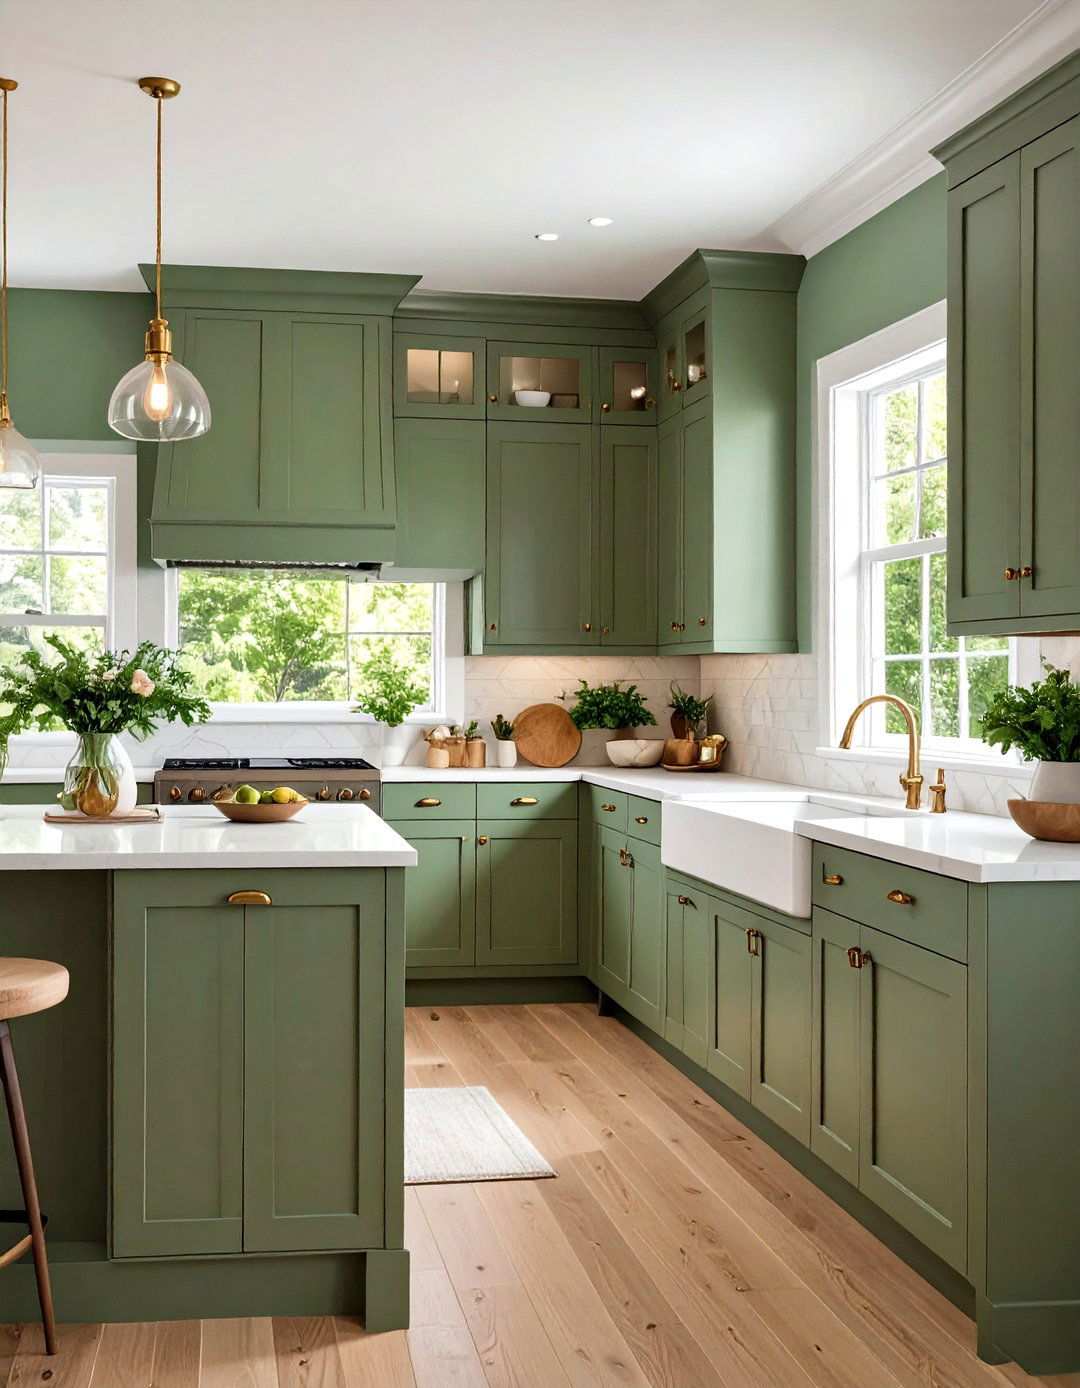
A well-chosen paint color can elevate wainscoting from a practical wall treatment to a defining design element that showcases a kitchen’s personality and harmonizes with existing materials. Present-day design trends favor earthy neutrals that blend seamlessly with natural wood accents and stone countertops, including warm grays, soft beiges, and creamy whites. For a striking contrast, bold accent colors can be used to create dramatic statements, with deep navy blues, sage greens, and charcoal grays adding sophistication against crisp white upper walls and cabinets. When selecting colors, it’s essential to consider the kitchen’s natural lighting conditions, as darker tones may feel heavy in rooms with limited natural light, while lighter colors might appear washed out in spaces with abundant sunlight. By adopting a two-tone approach, homeowners can achieve creative color balance by using deeper shades on wainscoting with lighter tones above, ensuring a harmonious visual weight. By coordinating colors with existing design elements, such as cabinet hardware, countertop veining, or backsplash tiles, homeowners can create a cohesive design flow that ties all elements together seamlessly throughout the space.
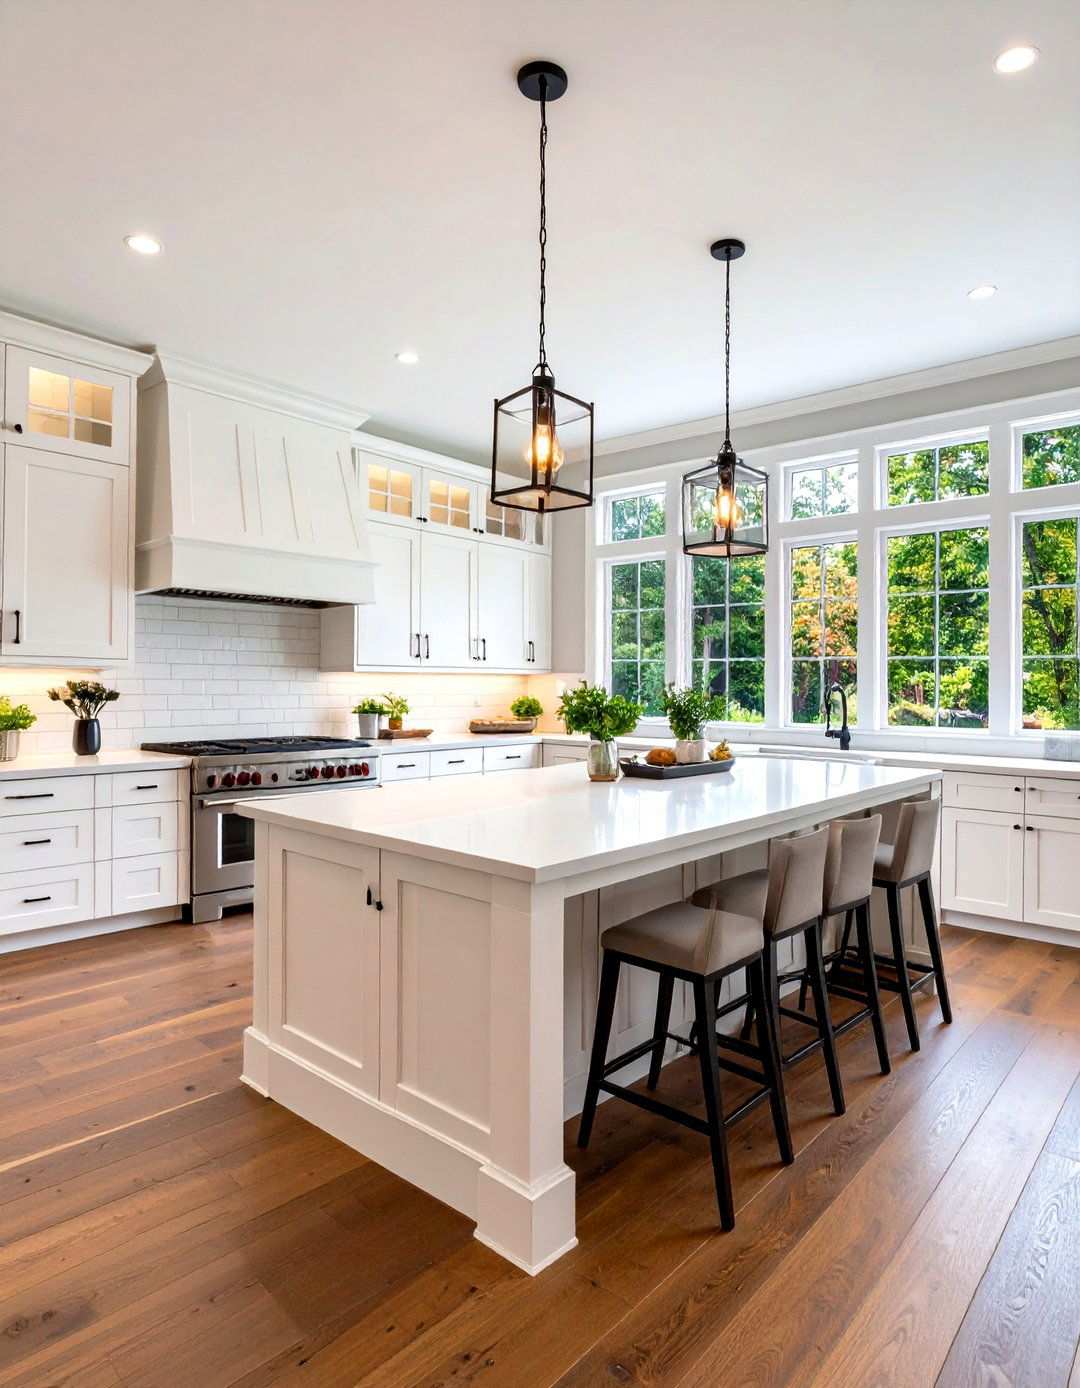
12. Maximizing High Wainscoting in Kitchen Spaces
High wainscoting installations that extend 48 to 54 inches create a striking architectural statement that works particularly well in kitchens with tall ceilings or open-concept designs. This approach not only provides additional wall protection but also creates a sophisticated backdrop for dining areas and seating arrangements. The increased height of high wainscoting is especially effective behind banquette seating or breakfast bars, where standard-height wainscoting might appear undersized relative to furniture scale. To enhance functionality and aesthetics, consider incorporating plate rails or display ledges into the top cap for convenient storage and decorative opportunities. However, high wainscoting requires careful proportion planning to avoid overwhelming smaller kitchens or creating choppy visual divisions in modest ceiling heights. To maintain airiness and visual interest, lighter paint treatments often become more critical with increased surface area, while professional installation is essential for ensuring consistent alignment over longer runs and proper integration with lighting fixtures, outlets, and other wall-mounted elements that must coordinate with the extended paneling system.
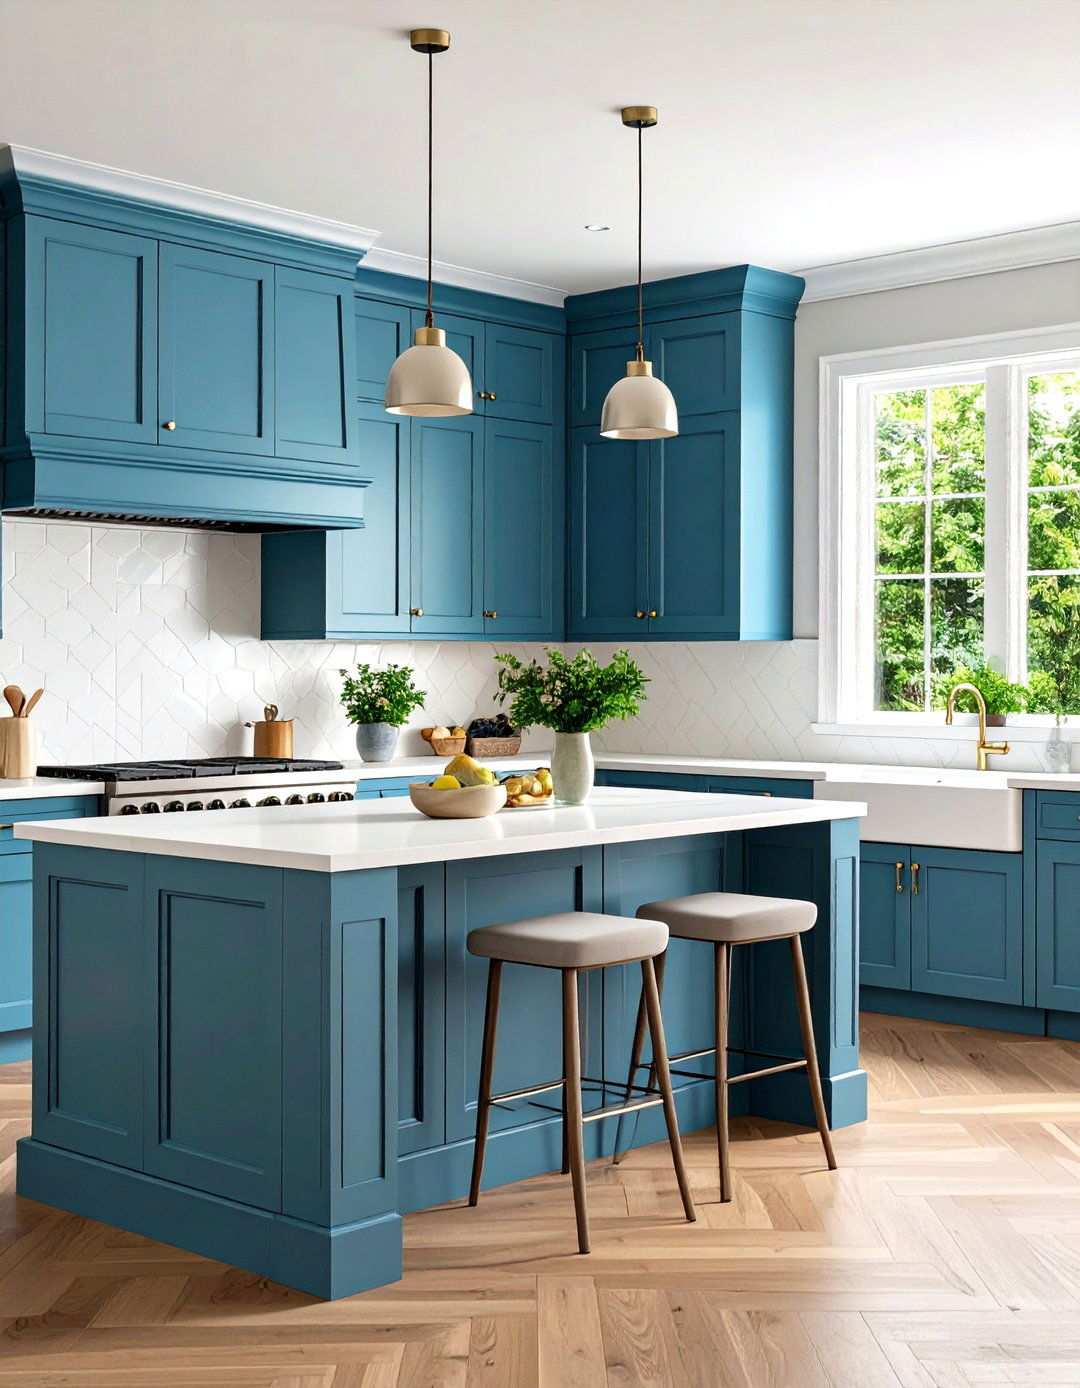
13. Kitchen Breakfast Bar Wainscoting Detail

Integrating breakfast bar wainscoting into your kitchen design not only adds a touch of sophistication but also serves a practical purpose. By protecting high-traffic areas from potential damage caused by stools and chairs, these installations provide a safe and durable solution for homeowners. Standard counter height, measuring 36 inches, creates a seamless integration with traditional wainscoting proportions, making it a straightforward choice for kitchen designers. For a polished look, consider extending panels around visible corners or limiting applications to the most prominent faces for a more budget-friendly approach. To achieve a cohesive design, coordinate panel styles with adjacent cabinetry, opting for matching door profiles or complementary simplified versions that enhance the overall aesthetic. The horizontal emphasis of breakfast bars is beautifully balanced by vertical panel orientations, adding visual interest and architectural appeal to the space. Easy-to-clean finishes become essential in areas prone to food spills and daily wear, making semi-gloss or satin paint sheens with stain-resistant properties an ideal choice. A professional installation ensures that the wainscoting aligns perfectly with existing cabinetry and integrates smoothly around electrical outlets and other functional elements.
14. Beadboard Kitchen Ceiling Combination
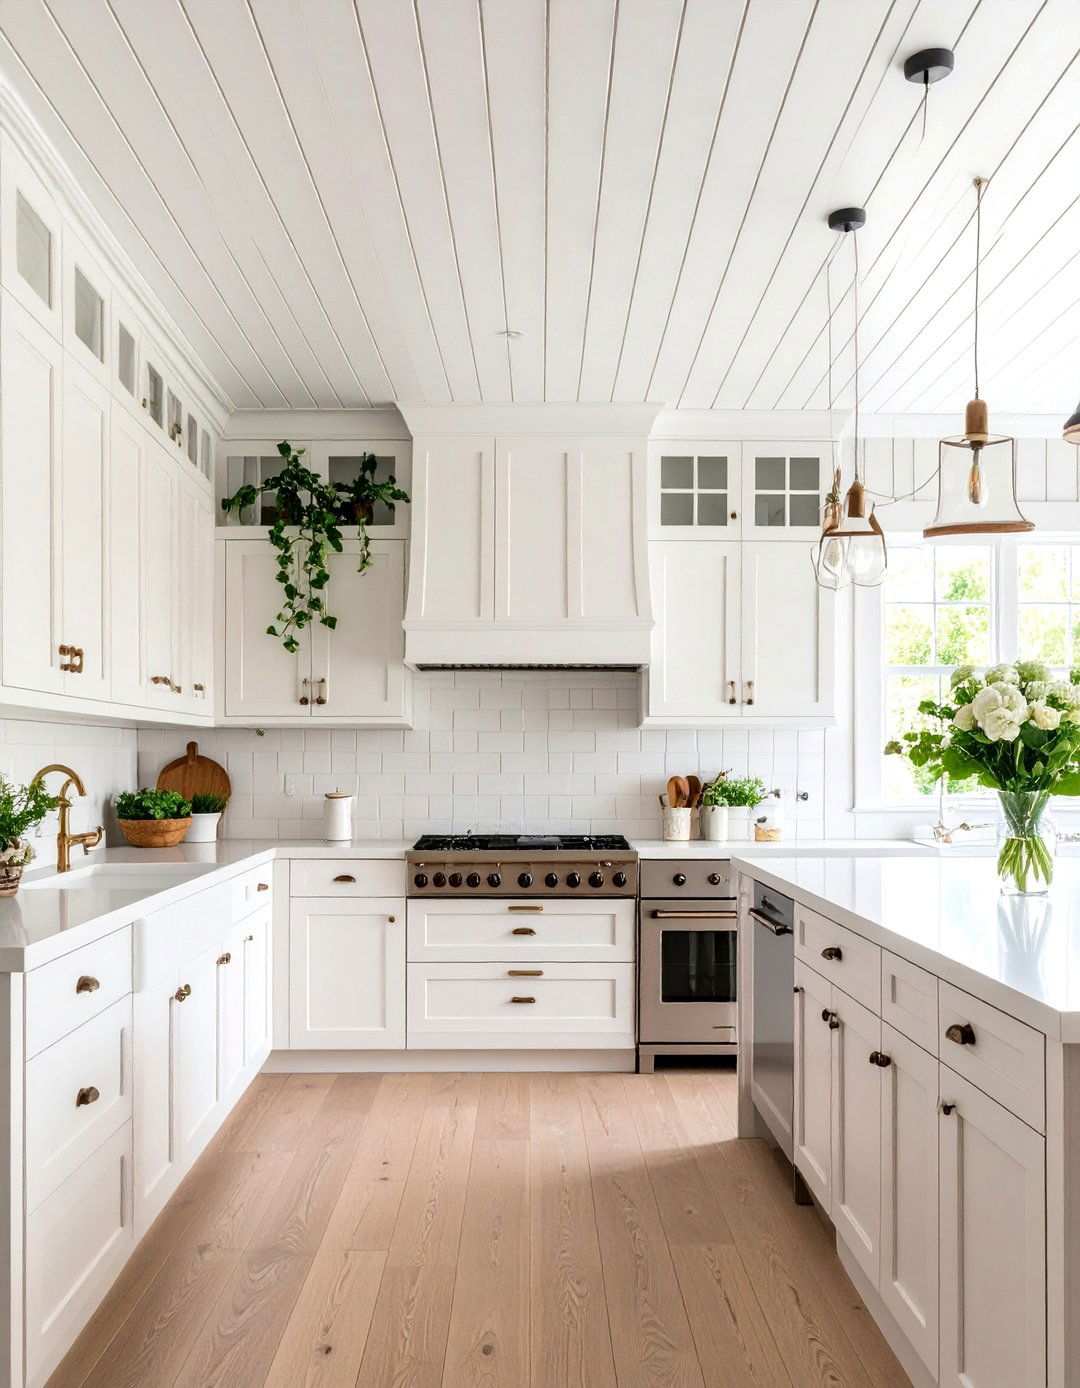
Beadboard wainscoting is often paired with matching ceiling treatments to create cohesive cottage-style kitchens that exude traditional craftsmanship and materials. This harmonious approach is particularly effective in smaller kitchens, where unified treatments make the space appear larger and more intentional. The vertical lines of wall beadboard perfectly complement the horizontal ceiling installations, creating visual texture without overwhelming modest room dimensions. To maintain the unified appearance, it’s essential to use consistent paint colors on walls and ceilings, typically opting for white or cream tones that maximize light reflection. For a finished look, consider adding crown molding or simple trim pieces where walls meet ceilings, showcasing attention to detail. While this combination approach requires a significant material investment, it creates distinctive architectural character that’s impossible to achieve through other means. Professional installation becomes critical for maintaining consistent panel spacing and smooth corner transitions that preserve the quality appearance this coordinated treatment deserves. This approach is particularly well-suited for farmhouse, coastal, or traditional kitchen designs where authentic cottage charm takes precedence over contemporary minimalism.
15. Harmonious Flow Between Kitchen and Mudroom Wainscoting
A seamless transition between kitchen and mudroom areas is achievable through wainscoting installations that adapt to the unique demands of each space. By maintaining a consistent design language, homeowners can create a cohesive look that acknowledges the functional differences between these adjacent rooms. Identical panel styles with varying heights can be used to optimize the performance of each area, ensuring that the kitchen section maintains traditional proportions (32-36 inches) while the mudroom section benefits from higher installations (48-54 inches) for maximum wall protection. The transition points between spaces provide an opportunity to incorporate creative detailing, such as decorative caps or corner blocks, that subtly acknowledge the shift in functionality. A professional installation ensures a smooth transition that respects the architectural integrity of the space while accommodating the distinct requirements of each area.
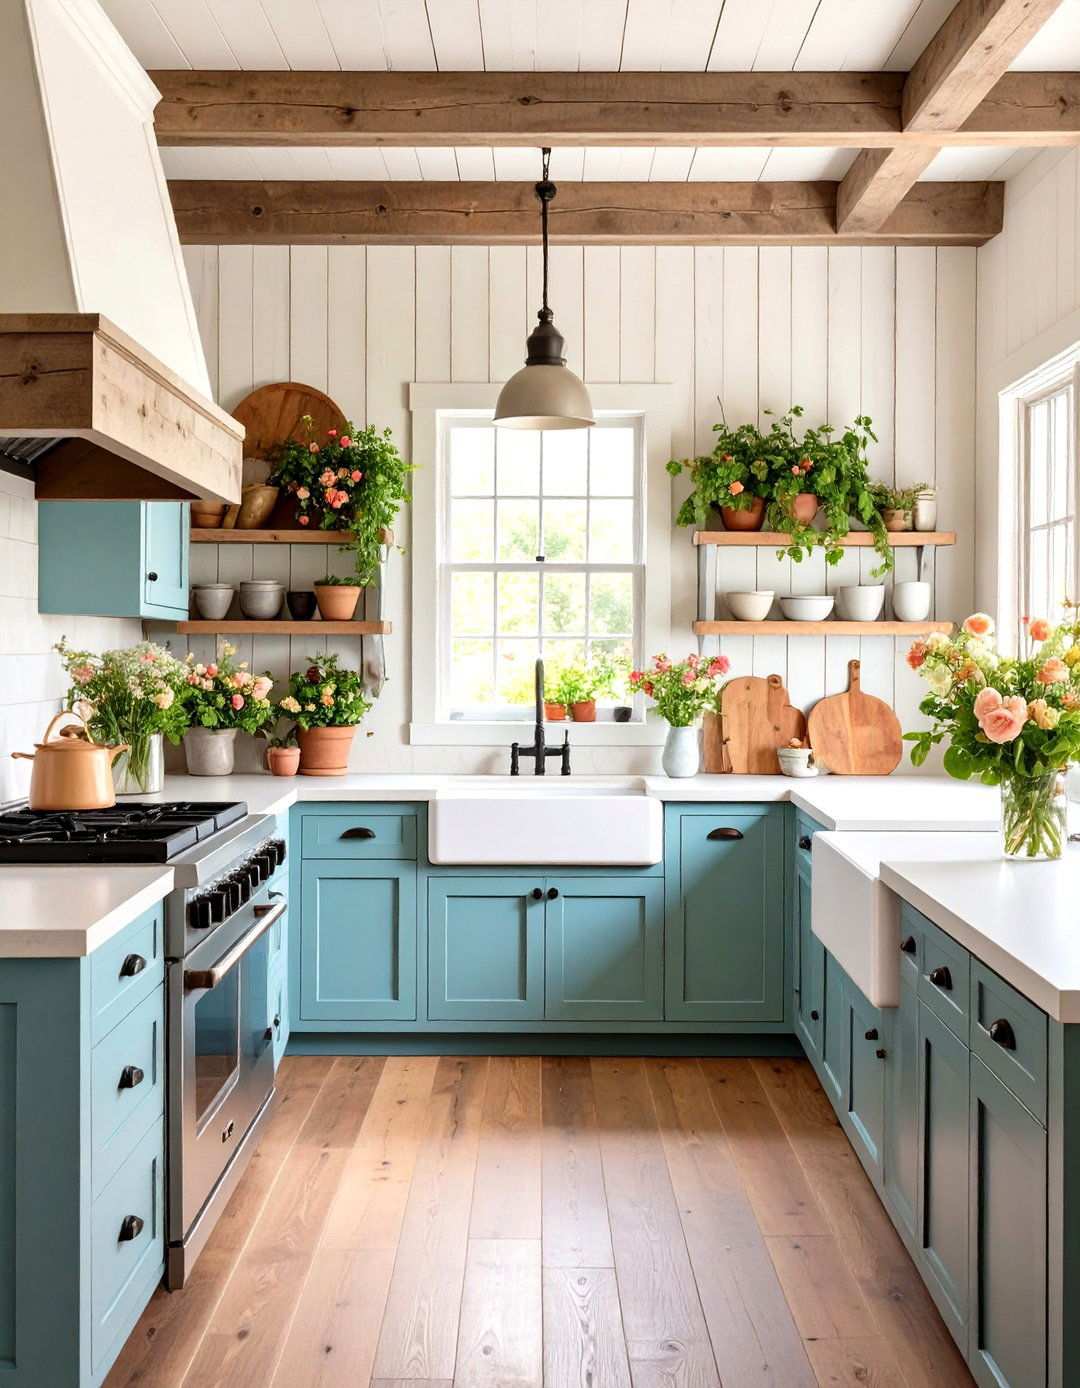
16. Authentic Farmhouse Wainscoting Design
Farmhouse wainscoting embodies the spirit of rustic simplicity and authentic materials, celebrating the traditions and practical craftsmanship of rural areas. This style is perfectly suited for farmhouse kitchens where functionality takes center stage over ornate decoration. Wide-plank beadboard, board and batten, or simple flat panels work beautifully in these spaces, complemented by natural wood finishes or painted surfaces in soft, earthy tones. To emphasize the agricultural heritage of farmhouse design, consider using horizontal plank installations with wider boards that reference the rustic charm of barn siding and agricultural buildings. A modest height (32-36 inches) maintains the down-to-earth proportions that define authentic farmhouse character, while coordination with other rustic elements like butcher-block countertops, vintage hardware, and apron-front sinks enhances the cohesive design flow. Installation can accommodate the charming imperfections that add to the authentic character of farmhouse design, creating kitchens that feel rooted in tradition while providing modern functionality for contemporary family life.
17. Contemporary Kitchen Wainscoting Materials
The modern kitchen wainscoting landscape has evolved, offering a wide range of innovative materials that surpass traditional wood options. These cutting-edge alternatives, including composites, metals, and synthetic materials, provide superior performance in high-traffic kitchen areas. One notable benefit of medium-density fiberboard (MDF) is its ability to deliver uniform surfaces ideal for painted finishes, eliminating the drawbacks associated with natural wood, such as expansion issues and visible grain patterns. Additionally, PVC and polymer options boast exceptional moisture resistance, making them perfect for areas surrounding sinks and dishwashers where traditional wood might deteriorate over time. These materials frequently arrive prefinished or can be beautifully painted, while maintaining dimensional stability that’s unattainable with natural wood. Metal wainscoting creates striking contemporary statements, particularly in industrial or modern kitchen designs where stainless steel or aluminum panels harmonize with appliances and fixtures. While installation techniques may vary depending on the material, they generally prove simpler than traditional wood applications. When selecting materials, it’s essential to consider maintenance requirements, as some options necessitate less upkeep while others may need periodic refinishing. By opting for professional installation, you can ensure proper material handling and application techniques that maximize performance while maintaining the sophisticated appearance contemporary kitchens demand. The introduction of these advanced materials has opened up new possibilities for creative applications previously unattainable with traditional options.
18. Kitchen Wainscoting Installation Heights
When it comes to kitchen wainscoting, selecting the right installation height is crucial for achieving balanced proportions and functionality. This requires careful consideration of ceiling heights, furniture scale, and the architectural context of your space. Standard installations at 32-36 inches typically work well in most kitchens with 8-9 foot ceilings, creating a sense of classical proportions that feel comfortable and familiar. In contrast, higher ceilings can accommodate taller wainscoting (42-48 inches) without overwhelming the space, while lower ceilings benefit from shorter installations (28-32 inches) that maintain proper scale relationships. To ensure seamless integration with existing elements, consider counter heights, backsplash dimensions, and window sill locations when determining final heights. The one-third rule provides a reliable guideline, placing wainscoting at approximately one-third of wall height for balanced proportions. To avoid creating static, uncomfortable divisions that make rooms feel choppy, it’s essential to avoid placing wainscoting exactly at mid-wall height. Professional installation involves careful measurement and layout to ensure consistent heights throughout the space, while accommodating inevitable variations in floor levels and wall conditions. This attention to proportion creates sophisticated results that enhance rather than compromise kitchen functionality and appearance.
19. Achieving Seamless Kitchen Corner Wainscoting
Crafting a unified aesthetic in kitchen wainscoting requires meticulous attention to detail, particularly when tackling the challenging corners. Mastering corner installations is crucial to maintaining a polished appearance, and specialized techniques can make all the difference. Inside corners, for instance, often employ clever workarounds like overlapping boards or bespoke corner blocks that seamlessly integrate with wall irregularities. This thoughtful approach ensures a finished appearance that elevates the overall design. Outside corners benefit from precision-crafted mitered joints or protective corner guards that safeguard vulnerable edges from damage while showcasing exceptional craftsmanship.
To create a cohesive look, it’s essential to plan panel layouts that balance symmetry around corners, avoiding awkward partial panels that disrupt the design’s harmony. Consider incorporating decorative corner blocks or rosettes at inside corners to add a touch of elegance and simplify the installation process. When tackling outside corners, slight adjustments to panel widths may be necessary to achieve equal reveals on both sides of the corner. Skilled installation demands meticulous measurement and test fitting to ensure a seamless transition that maintains uninterrupted sight lines. The end result is a wainscoting system that appears deliberate and long-lasting, rather than an add-on afterthought in the kitchen space.
21. Budget-Friendly Kitchen Wainscoting Options
When it comes to incorporating wainscoting into kitchen design without breaking the bank, savvy homeowners can explore cost-effective solutions by thinking outside the box. Stores offering pre-fabricated panels make it easier to save money compared to custom millwork, delivering acceptable quality that meets most homeowners’ needs. Not only do composite and MDF materials provide significant cost savings over solid wood, but they also accept paint finishes beautifully and ensure consistent dimensions that simplify installation. For those willing to invest time in learning the necessary skills and acquiring the right tools, DIY installation can greatly reduce costs. Basic styles such as flat panels or beadboard require fewer specialized skills than complex raised panel systems, making them perfect for first-time installers. To maximize visual impact within budget constraints, consider limiting installations to high-impact areas like kitchen islands or dining nooks. When it comes to choosing materials, paint-grade options are often more budget-friendly than stain-grade materials, yet offer equal durability when properly finished. By taking the time to plan and measure carefully, homeowners can minimize material waste and stay within budget.
Effective wainscoting installation doesn’t have to mean sacrificing style for affordability. With a little creativity and planning, homeowners can achieve attractive results that enhance kitchen value without requiring significant financial investments. By exploring cost-effective solutions and taking the time to plan and measure carefully, homeowners can enjoy the aesthetic benefits of wainscoting without breaking the bank.
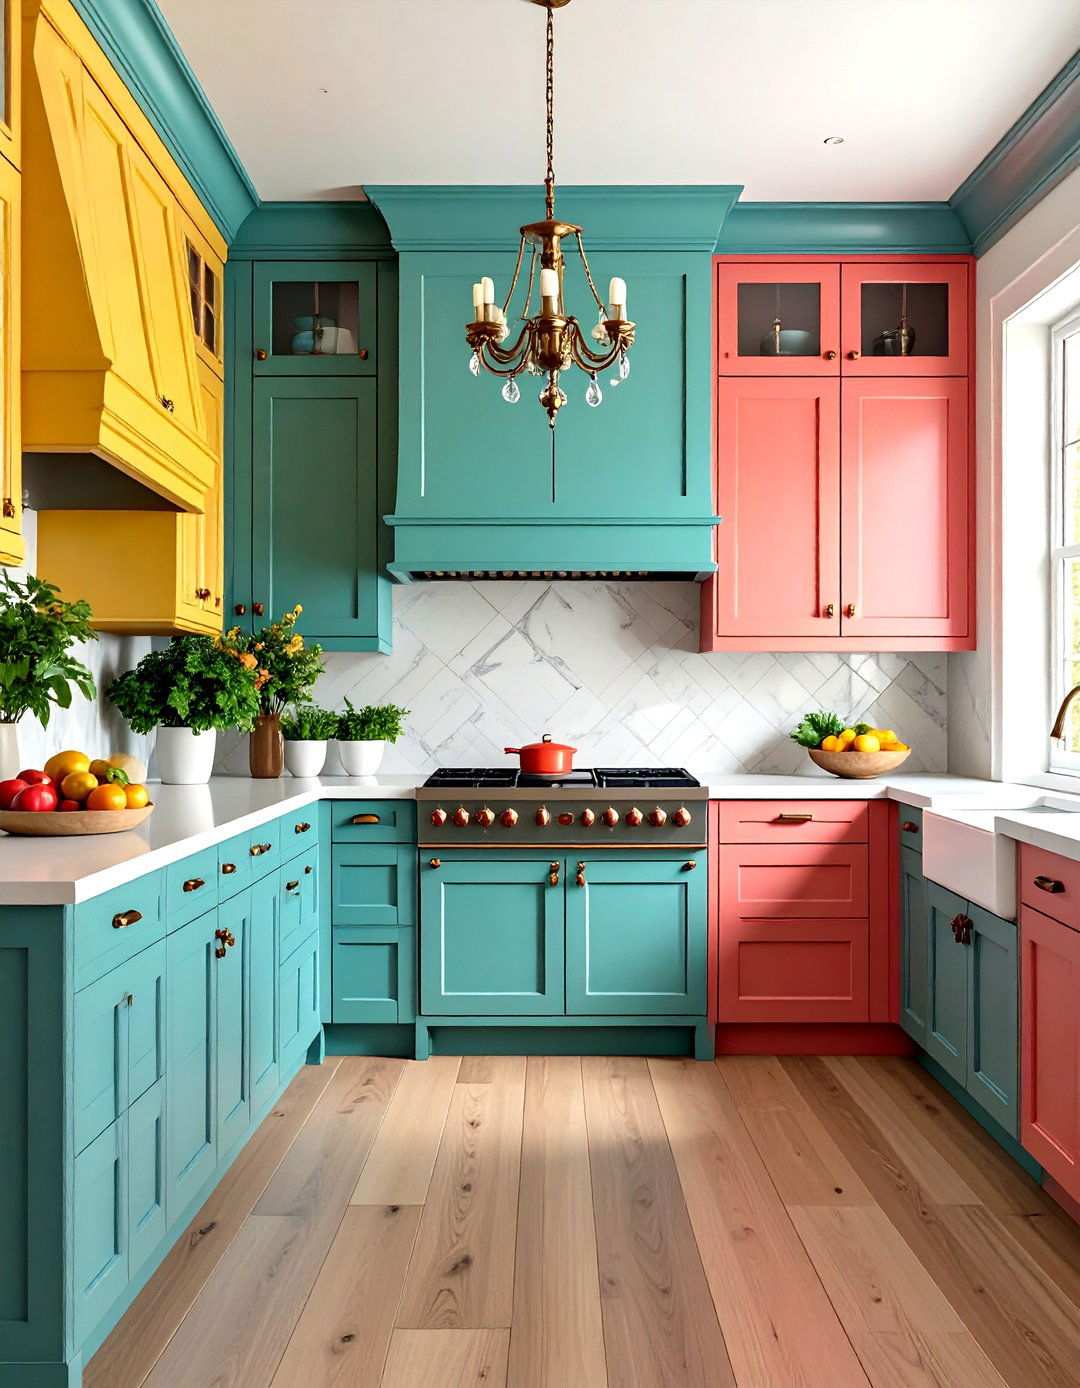
22. Kitchen Wainscoting Color Coordination
Achieving a cohesive look in the kitchen with wainscoting color coordination requires careful consideration of existing elements, including cabinetry, countertops, backsplashes, and flooring materials. A monochromatic approach using varying shades of the same color family creates a sophisticated, unified appearance that makes kitchens appear larger and more intentional. For a more dynamic look, homeowners can pair wainscoting with contrasting cabinet colors, creating a visually appealing contrast that adds depth to the design. When selecting colors, remember that warmer tones can create a cozy, inviting atmosphere, while cooler colors can give the space a more spacious and contemporary feel. Natural lighting conditions can significantly impact the appearance of colors throughout the day, so it’s essential to evaluate colors under various lighting conditions before making a final decision. To ensure comprehensive design cohesion, coordinate with hardware finishes, faucets, and lighting fixtures. Testing paint colors in actual kitchen conditions using large samples will provide a more accurate representation of the final appearance. With the right approach, homeowners can avoid costly mistakes and create a kitchen that feels intentionally designed rather than assembled from random elements.
23. Kitchen Peninsula Wainscoting Applications
When it comes to transforming kitchen peninsulas into stunning focal points, peninsula wainscoting proves to be an excellent solution. This clever design element not only provides protection and architectural interest but also seamlessly integrates with adjacent living spaces. Typically, wainscoting installations focus on the room-facing side of peninsulas, where visual impact is crucial for open-concept designs. Standard counter height aligns perfectly with traditional wainscoting proportions, making integration a breeze and allowing for consistent sight lines with adjacent cabinetry. For a more comprehensive look, consider extending treatments around visible corners or limit applications to primary faces for a budget-friendly approach. The horizontal emphasis of peninsulas is beautifully complemented by vertical panel orientations, which provide a sense of balance and prevent monotonous appearances. To create a cohesive design, coordinate with adjacent room treatments, ensuring seamless flow and a unified look that bridges the gap between connected spaces. Expertly installed wainscoting not only enhances open-concept functionality but also provides the architectural definition needed to prevent sprawling spaces from feeling undefined. When done correctly, peninsula wainscoting beautifully bridges the gap between kitchen and living areas, maintaining distinct zone identity within unified design schemes.
24. Kitchen Wainscoting Hardware Integration
Integrating electrical components into wainscoting installations requires meticulous planning and skilled execution to achieve clean, professional appearances while preserving functionality. Modern electrical codes often present challenges in traditional wainscoting designs, necessitating creative solutions that satisfy both requirements. To overcome these obstacles, consider relocating outlets above wainscoting height when possible or integrating them into panel layouts through careful measurement and custom cutting. Switch plates and outlet covers should complement wainscoting finishes by matching paint colors or using decorative covers that enhance the overall design scheme. Experienced electricians can relocate circuits when necessary to optimize wainscoting layouts while maintaining code compliance and safety standards. Light switches present particular challenges in dining areas where wainscoting might interfere with standard placement heights. To avoid conflicts with panel layouts, plan fixture mounting carefully or integrate mounting blocks that provide secure attachment points without compromising panel integrity. Effective coordination between tradespeople is essential to ensure successful installations that meet both aesthetic and functional requirements. By planning carefully, homeowners can avoid costly modifications during installation and enjoy long-term satisfaction with both appearance and performance.